
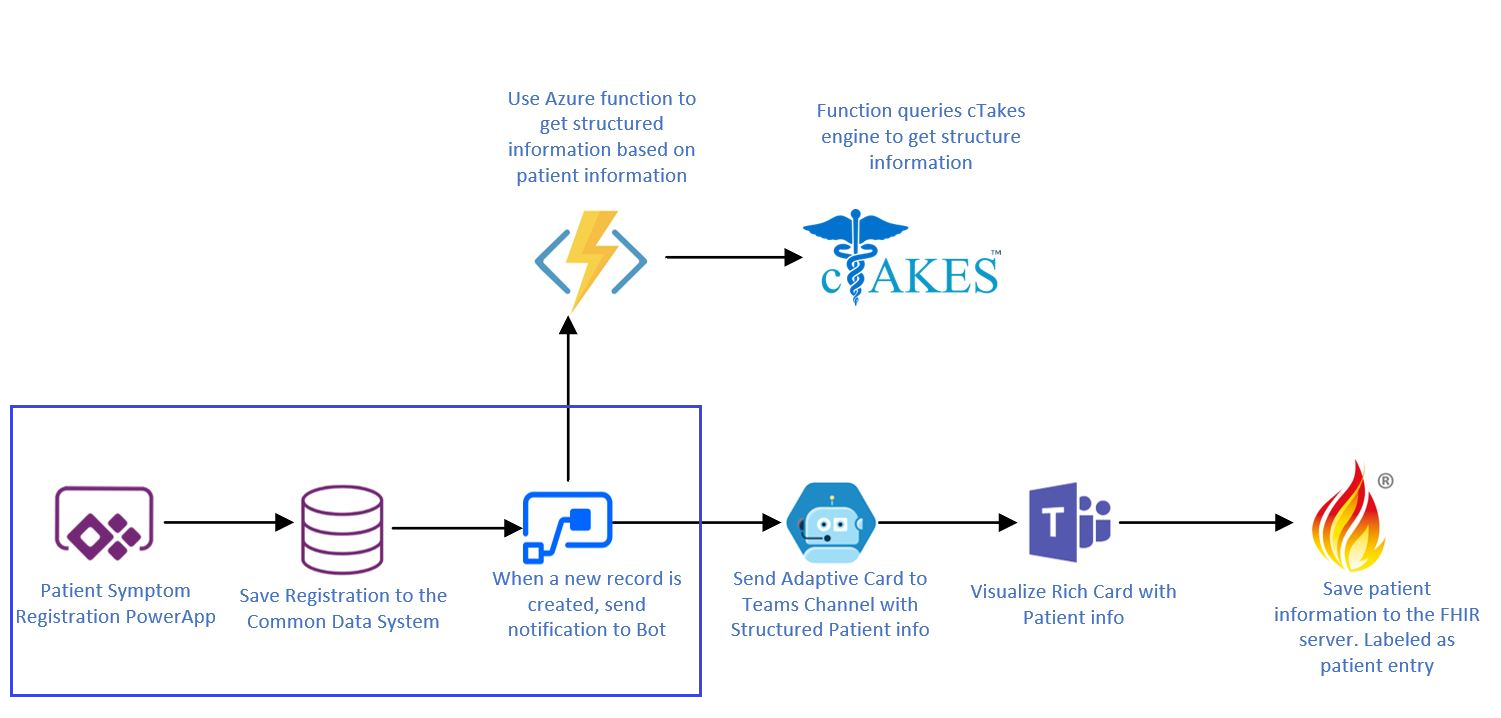
In this post I want to dive deeper on the Power elements of the Patient Symptom Solution I created last time.
More specifically, I want to cover how I used PowerApps, the Common Data System and Power Automate to capture the patient symptom information and store this in a secure and flexible way, to then start a proactive scenario in Teams.
The first step in the solution is capturing patient information, for this I am using a Canvas app in the PowerApps Platform. With PowerApps you can design pixel perfect applications by dragging and dropping elements on a canvas, just as you would design your slides in PowerPoint. It also allows to use Excel-like expressions .
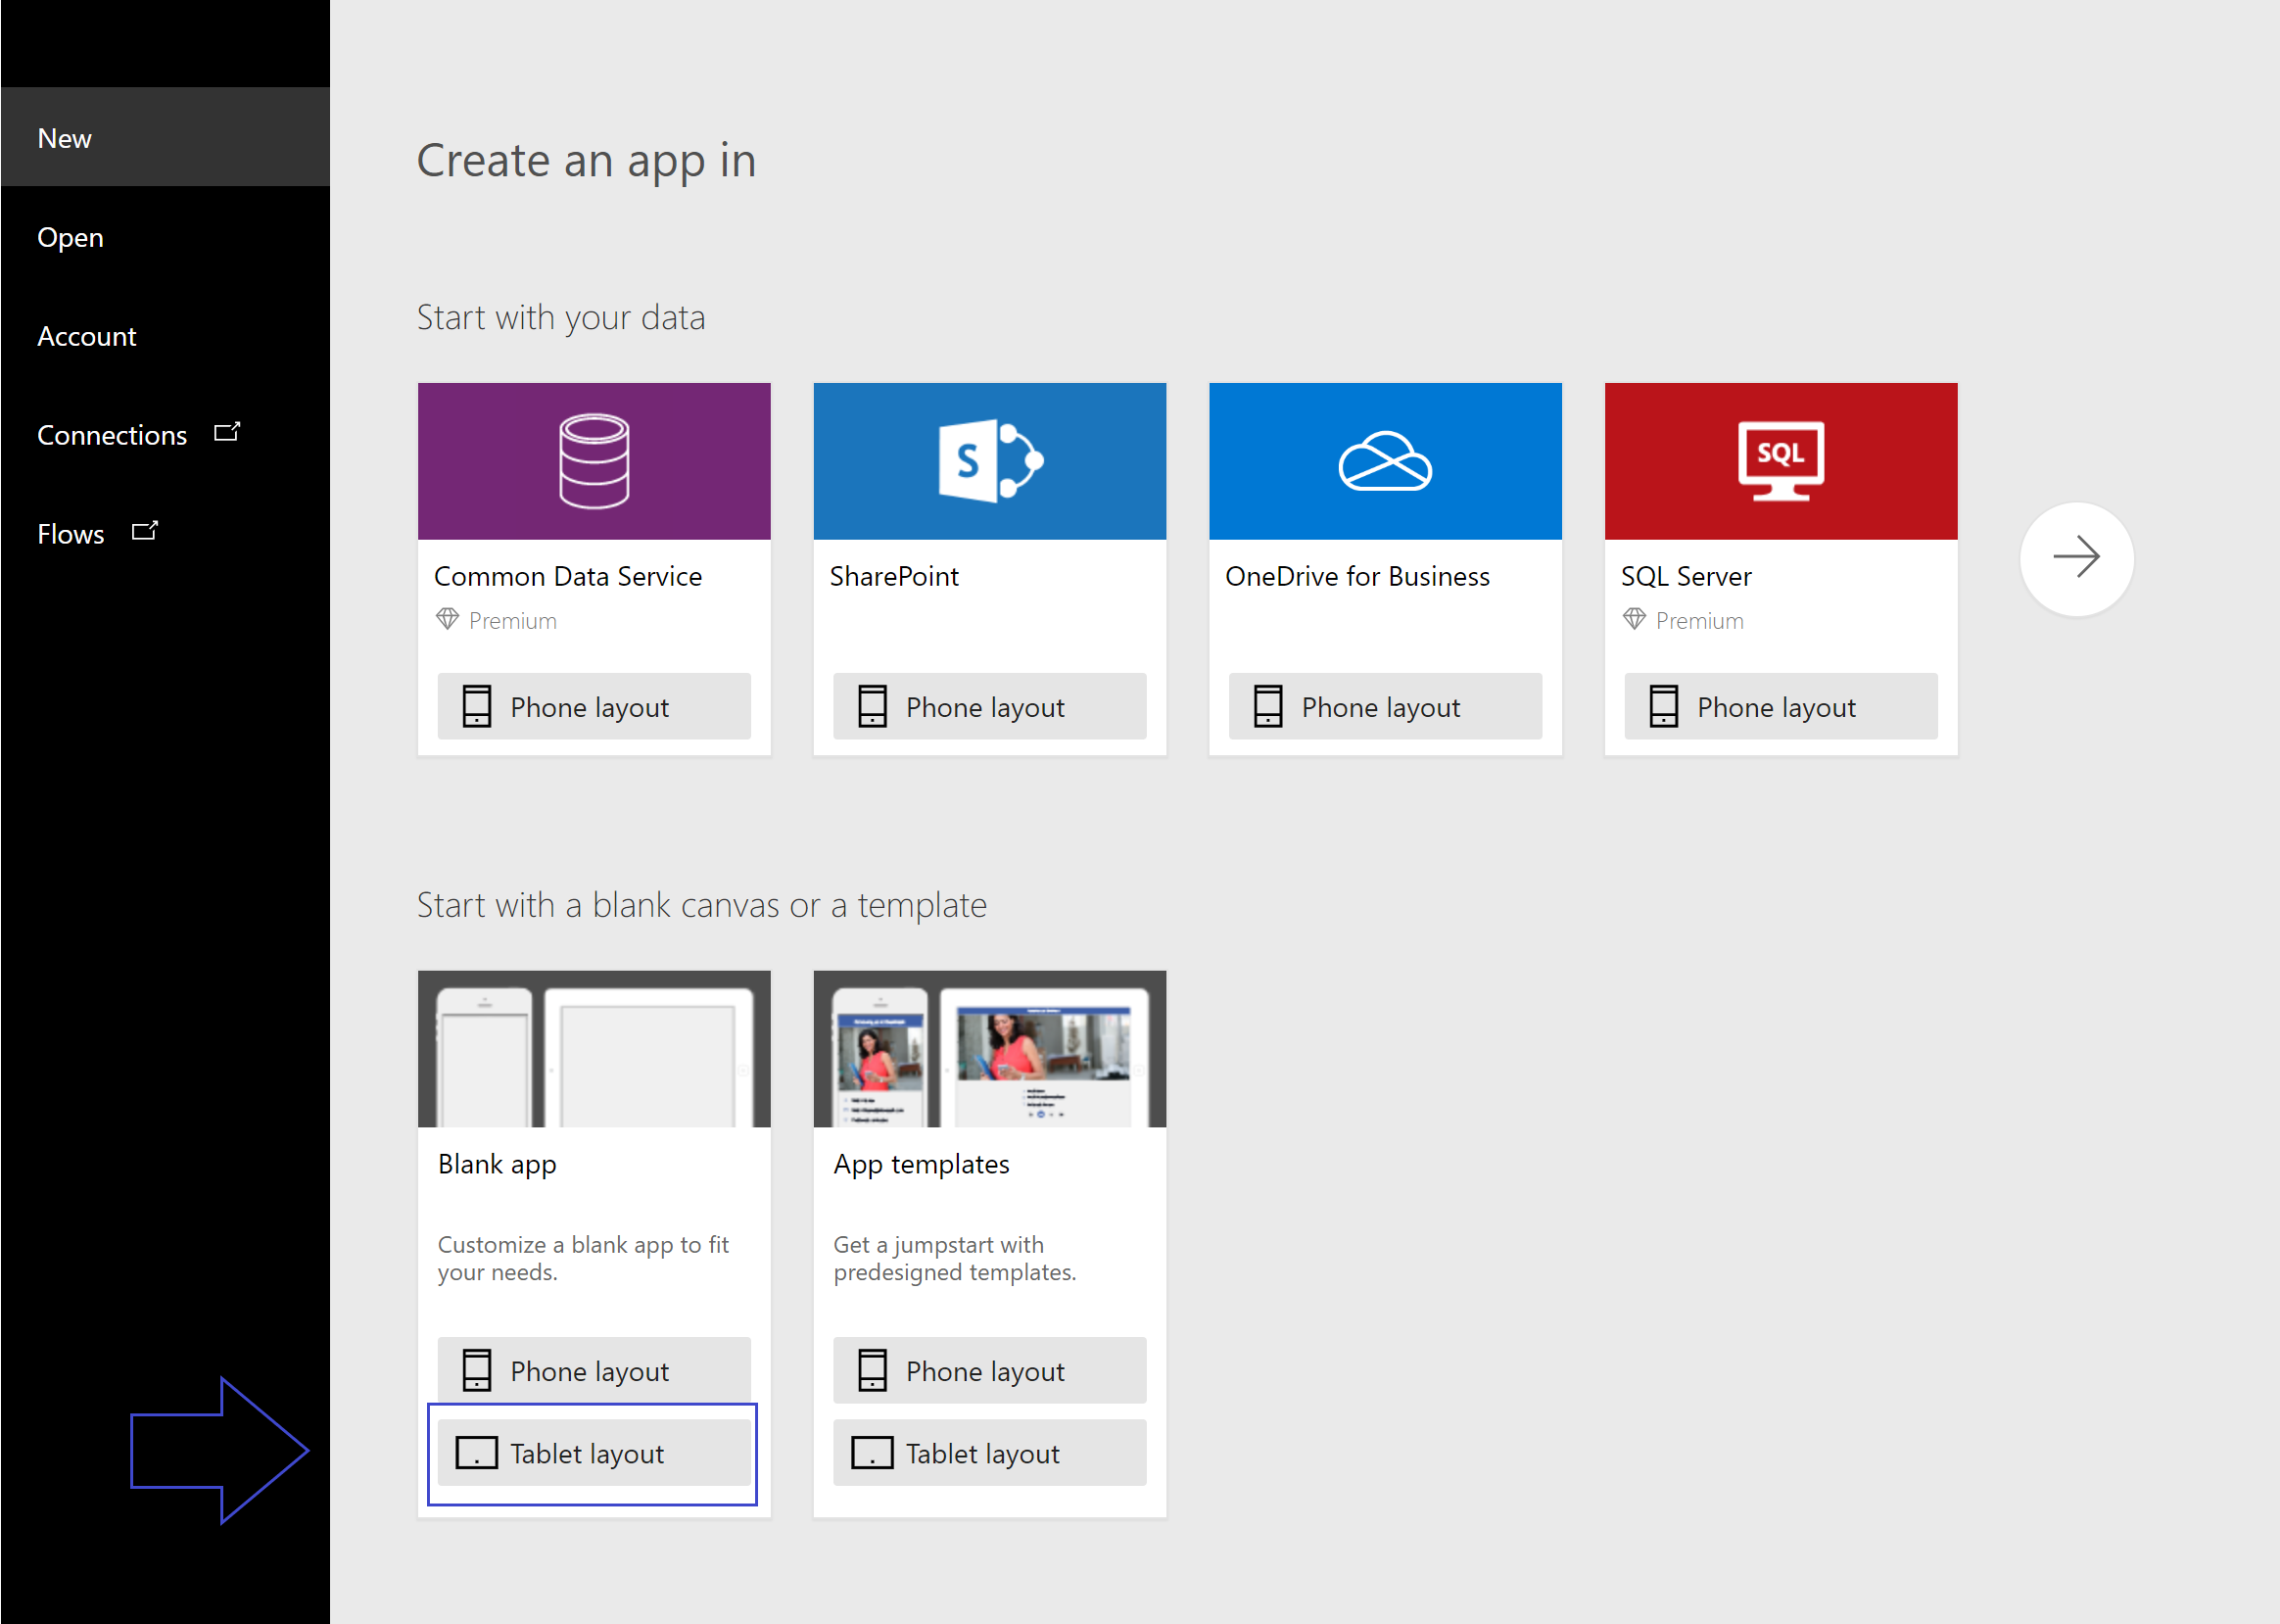
Lets start with creating a new Canvas app. Navigate to https://create.powerapps.com/ and create a new Blank app, in Tablet layout.
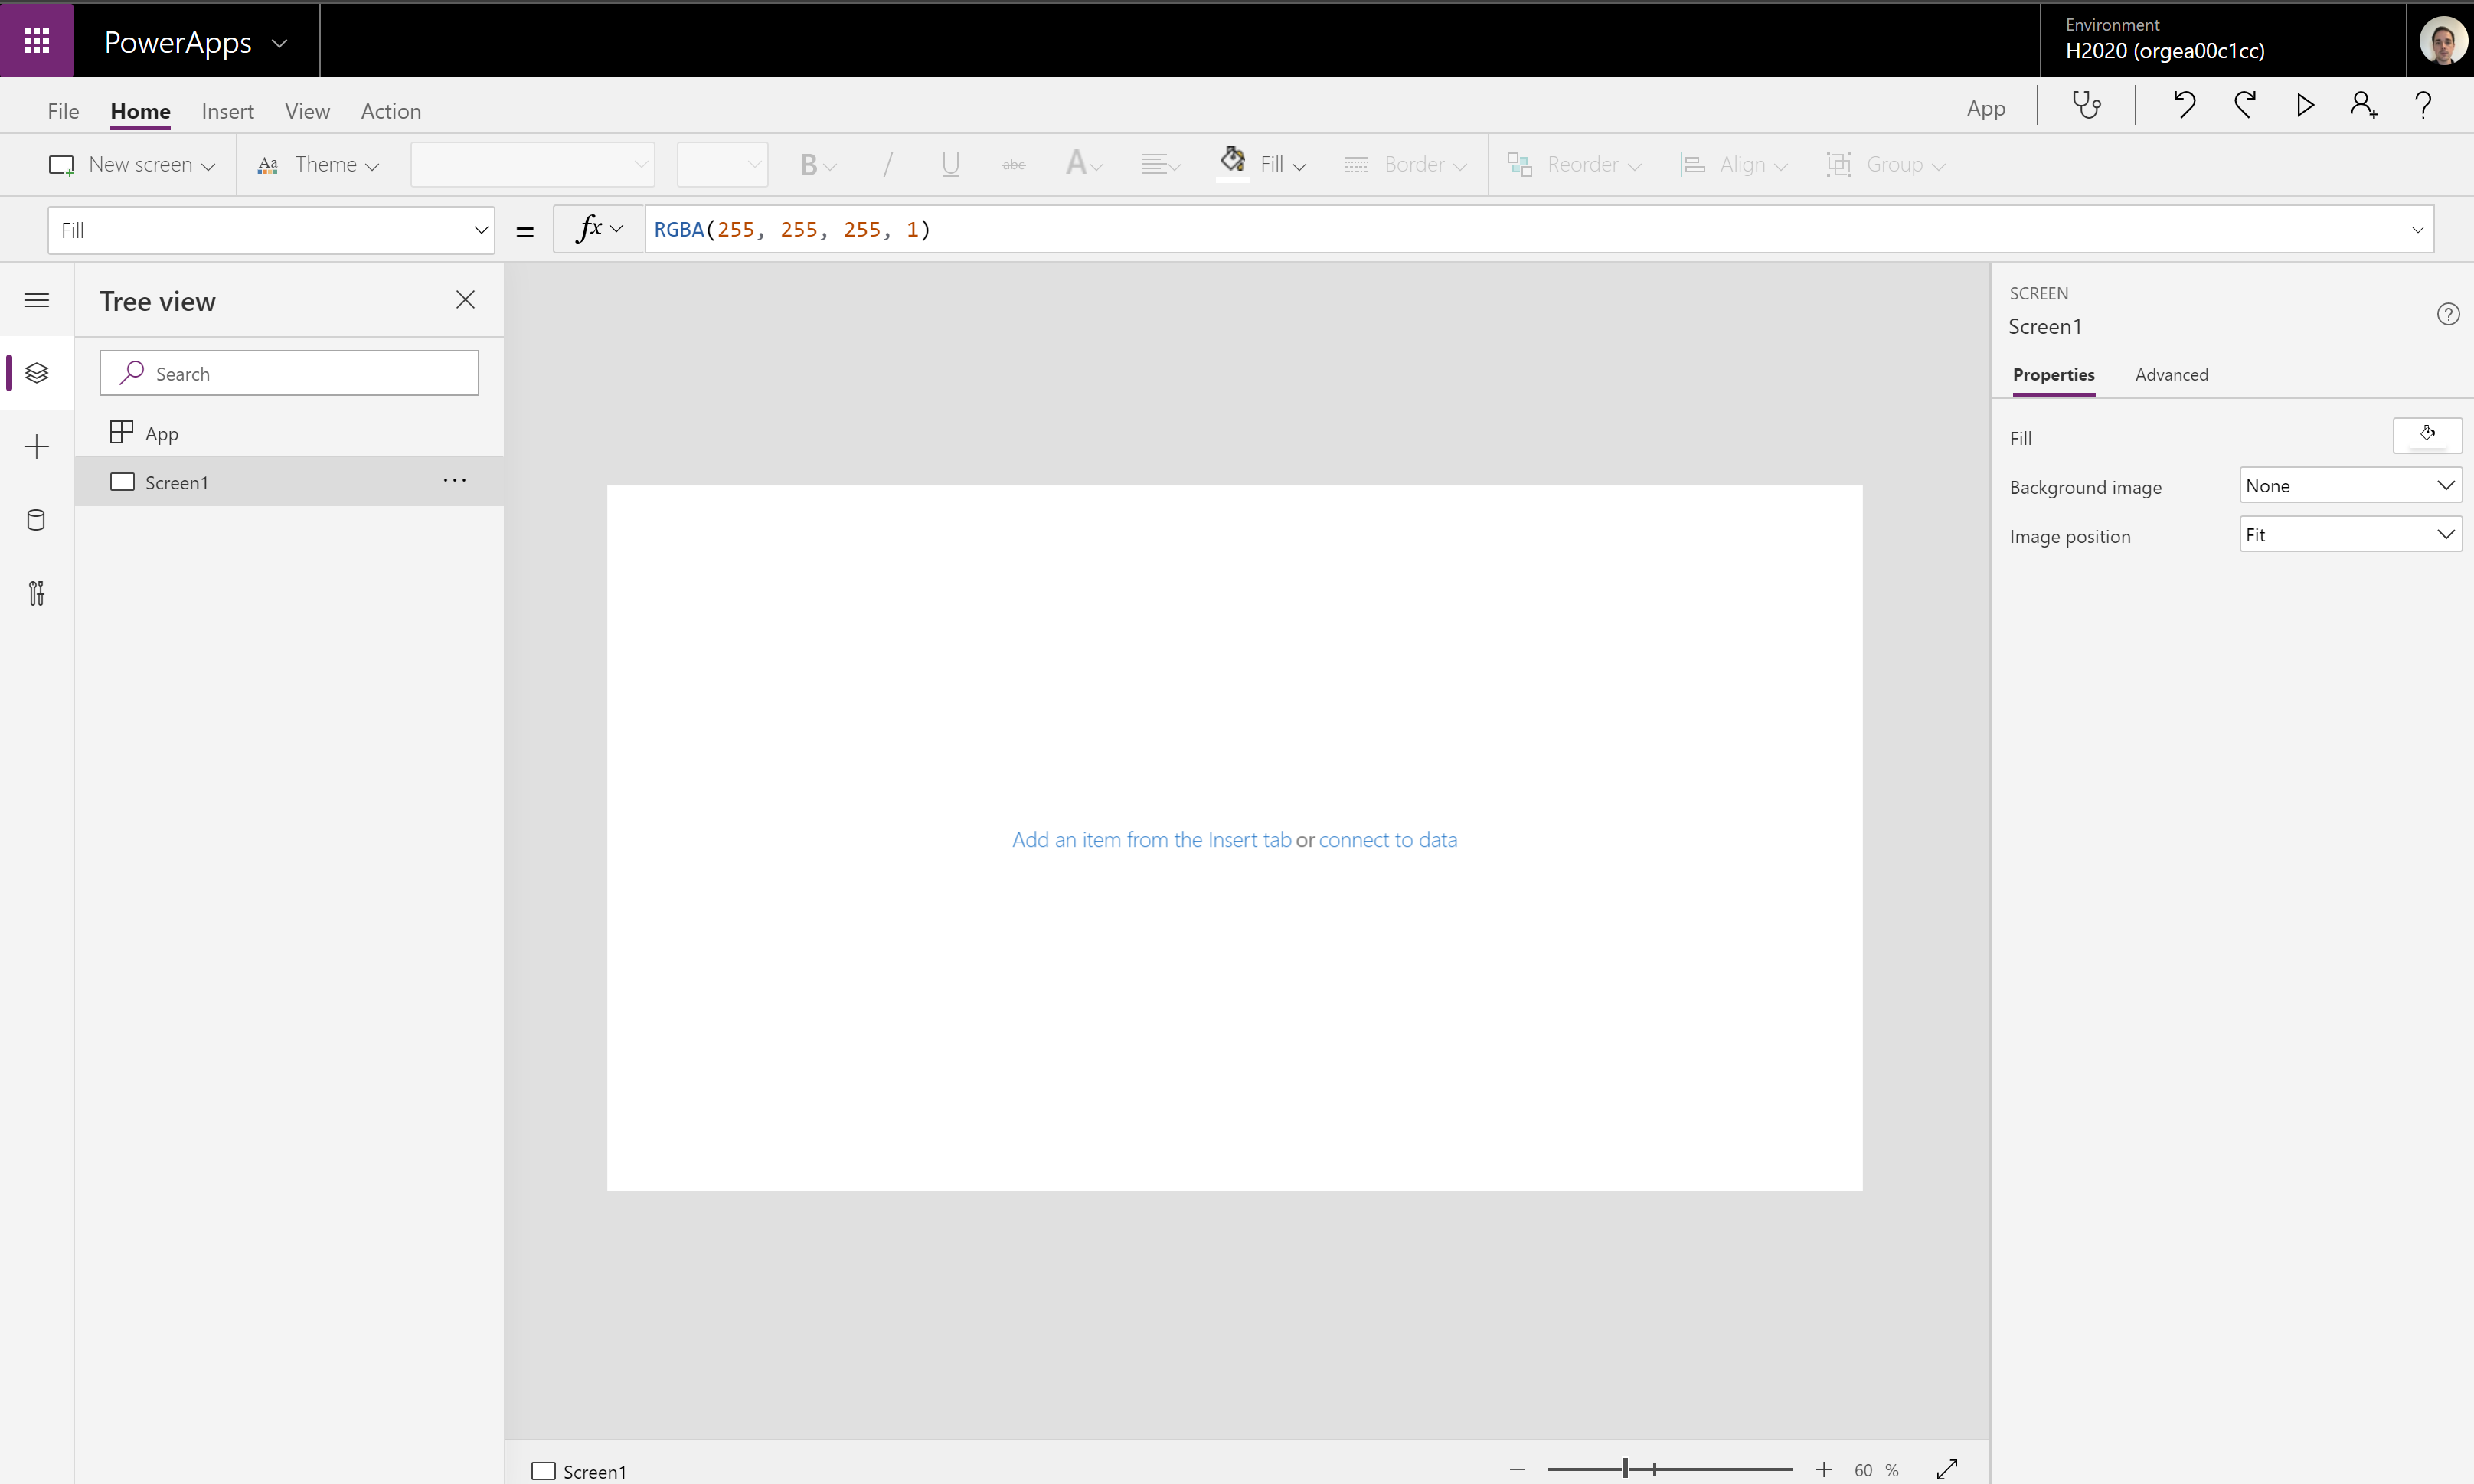
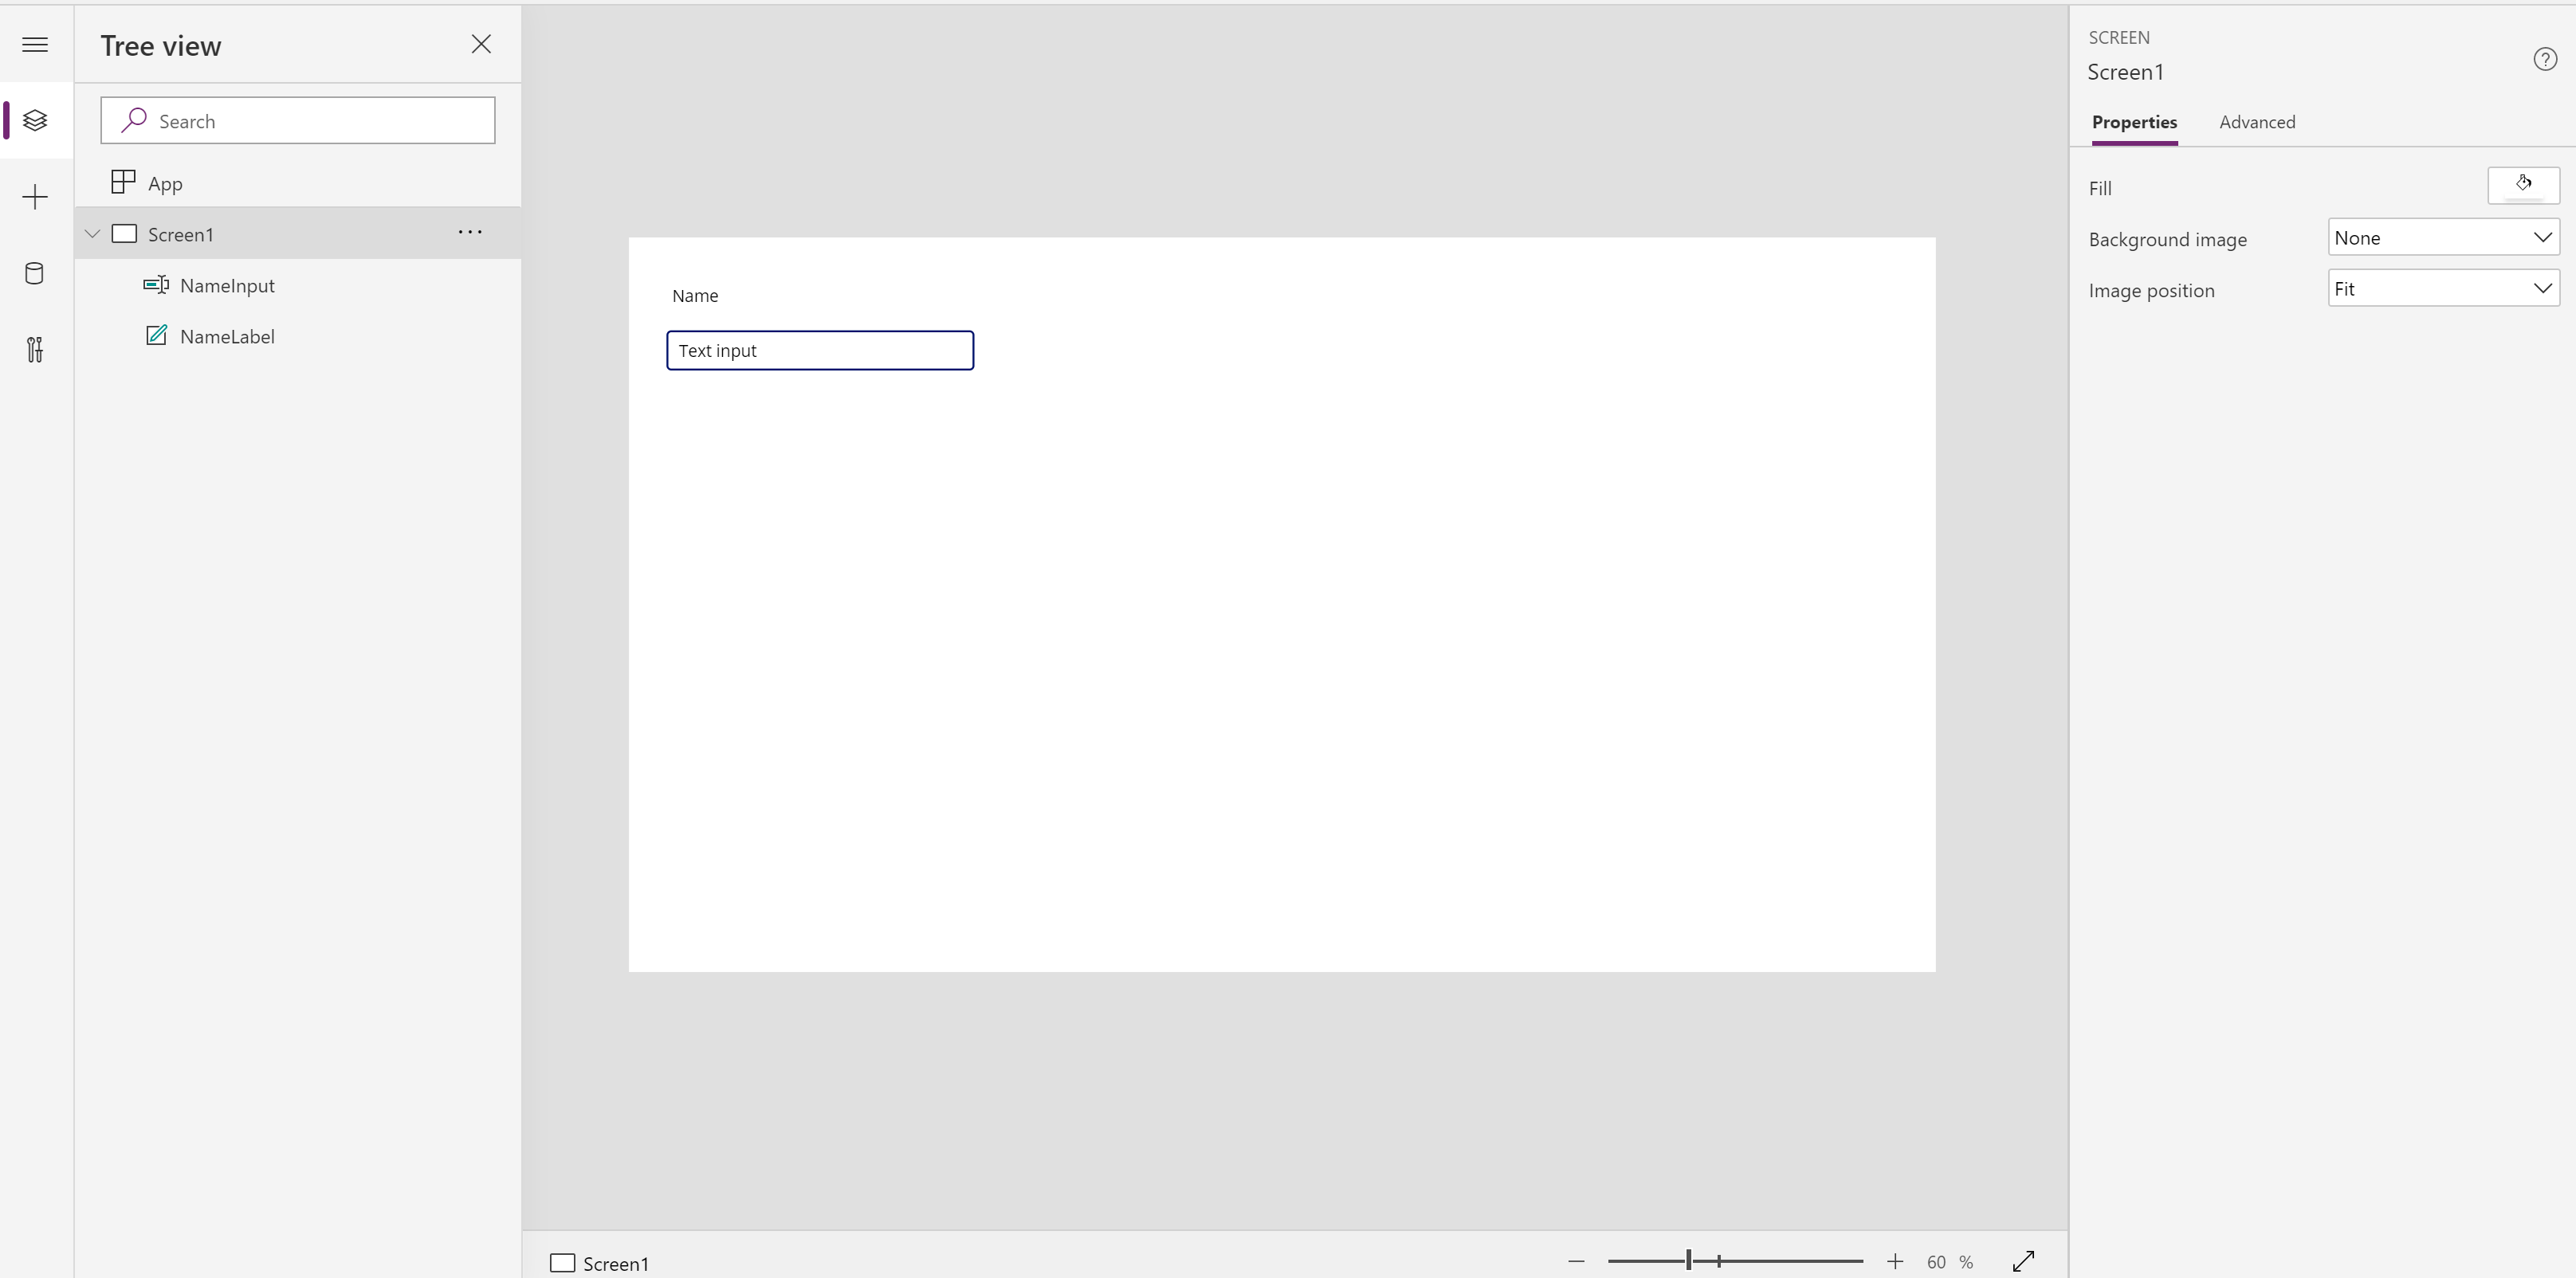
When you have selected the Tablet Layout, you should see a similar screen as in the screenshot below.
On the left side you already have your first screen (screen1), this is similar to a slide in PowerPoint
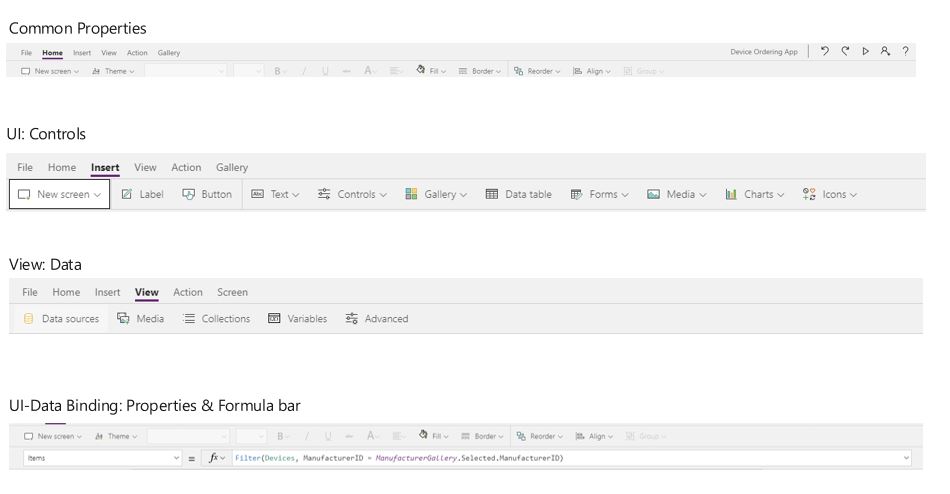
There are different parts available to create a PowerApp. If you have worked with Microsoft Office before, most of these elements will look familiar.
To give some examples, the Formula Bar is similar as the one from Excel, the Left Navigation Bar is equal to the navigation of visualization of PowerPoint slides and the Ribbon is a well known part in all the Microsoft Office products.
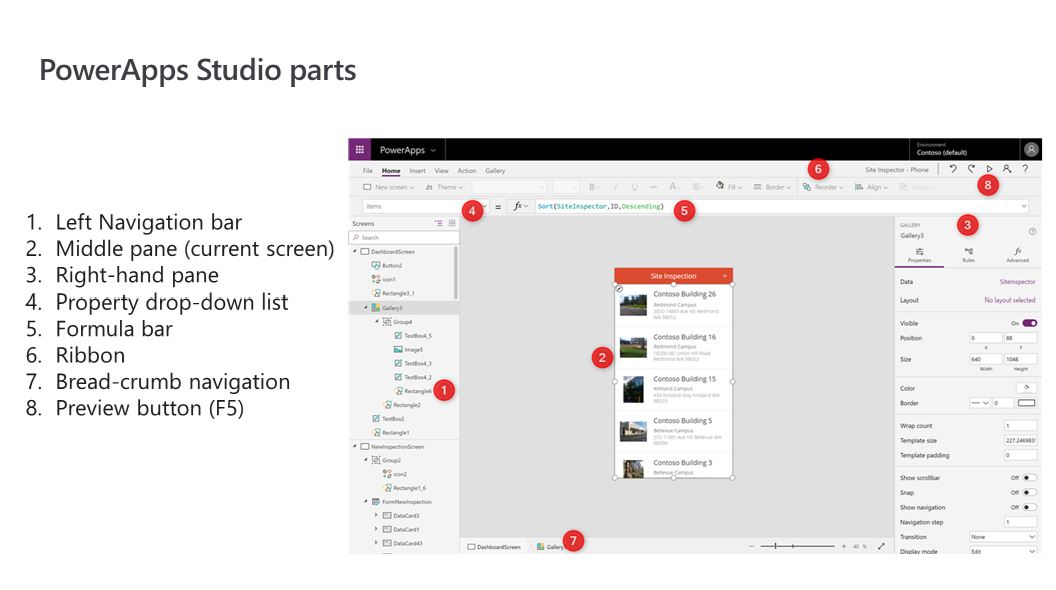
In this post, I am not going to cover every element that is available in the PowerApp studio, but the image below gives you an overview of the elements that are available in the PowerApp Studio.
As always, you can find extended information via our amazing docs site: https://docs.microsoft.com/powerapps/
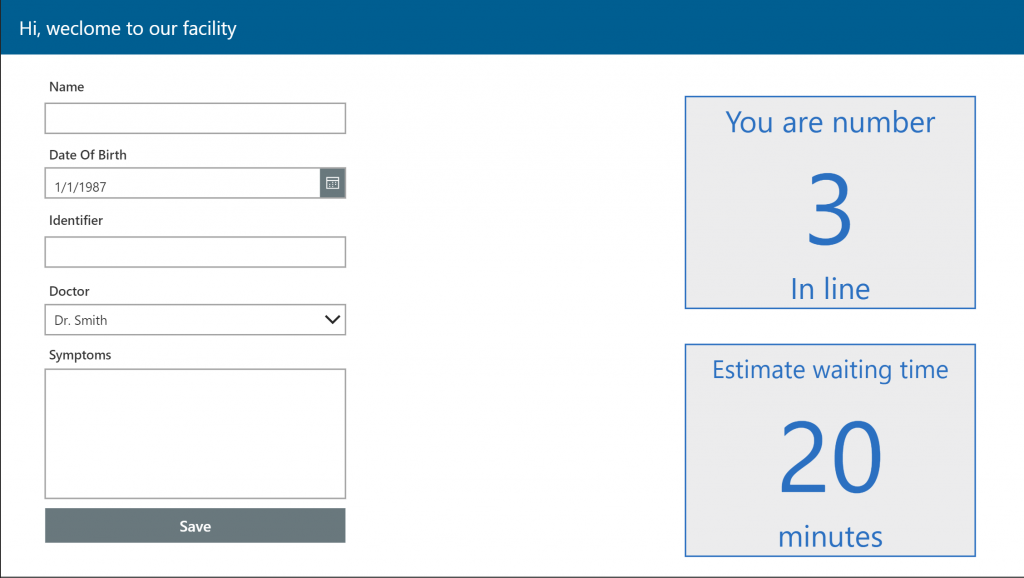
For this project, we are going to create a form that captures basic information, together with the provided symptom data from the patient.
Navigate back to your PowerApp Studio, Click on the Insert button in the top ribbon, and select Label and then Text Input.
There are now 2 new elements on your canvas, you can style, position or rename them. I recommend to start renaming the elements to self explanatory variables, such as Label1 to NameLbl and Input1 to NameInput. This will provide clarity and overview later in the design process.
To complete the form, you need add some more elements and position them in a logical order, just as the screenshot below:
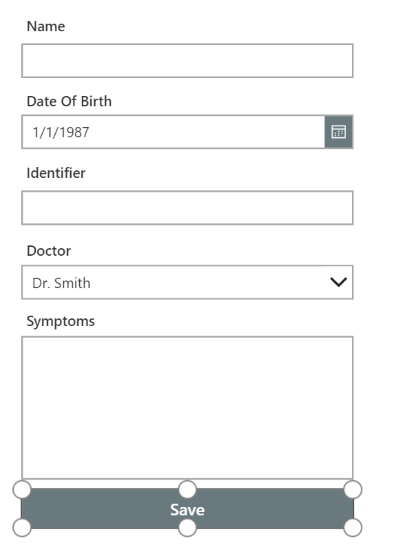
When you have finished adding the Name, Date Of Birth, Identifier, Doctor and Symptom fields and button, you can start with the second phase of the process: saving the information.
When working with the PowerPlatform, you can leverage the power of the Common Data Service.
The Common Data Service lets you securely store and manage data that’s used by business applications. Data in Common Data Service is stored within a set of entities. An entity is a set of records used to store data, similar to how a table stores data within a database.
In this section we are going to create a new Entity to store our Patient Symptom Information
To start creating our new entity, navigate to https://make.powerapps.com/ , when you are logged in, you should have a similar navigation bar, at the left side of your screen
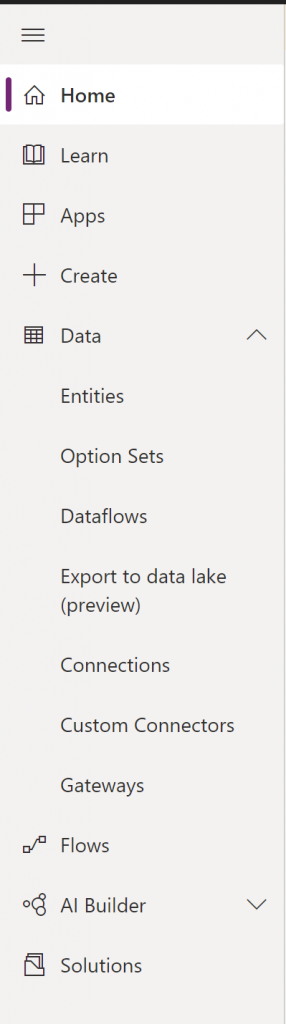
Click on the Entities menu, below the Data section. Here you have a list with all the default available entities that can be used for your applications, such as PowerApps, Dynamics, Office, Web, …
The Common Data System is much more then a normal data storage provider. It leverages different Azure services, such as Azure SQL, CosmosDb, Azure Blog Storage, … to make sure every data type is used in the best way possible. The system is created for scale, security and flexibility.
When you create a new entity, it is always good to see what is already available, and potentially start from an existing Entity, but for this project, we are going to create a new PatientSymptom record.
To create a new Entity, click on New Entity , in the left top bar. Enter PatientSymptom in the Display name and click on Create.
The next step is adding all the fields for this Entity. You can do this by clickin on Add Field and provide a Display name, then click on Done. For this project you will need to provide following fields:

When you have added the fields above, you have everything you need to store the data in the PowerApp.
Pretty easy eh? 🙂
We now need to extend our PowerApp with the new Entity we created.
Navigate back to your PowerApp and click on View, then Data Sources in the top ribbon, search for Common Data Service
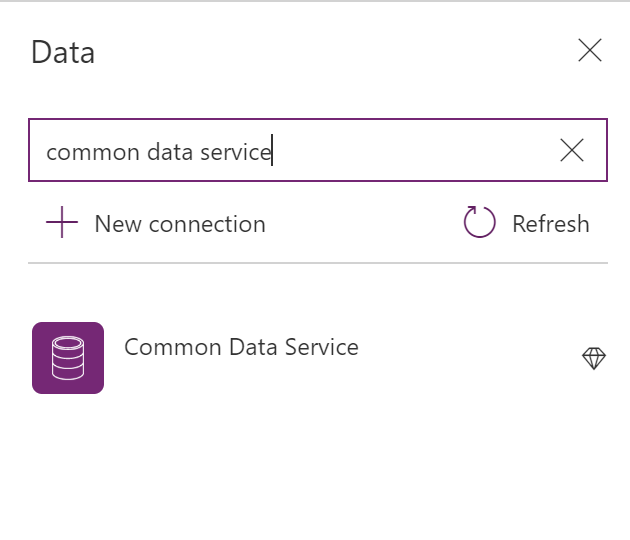
Click on the PatientSymptoms entity, and it will be added to your Application.
Next step, extend the OnSelect behaviour in the PowerApp to save the data to the newly created PatientSymptom Entity.
Select the save Button element that you added on the canvas.
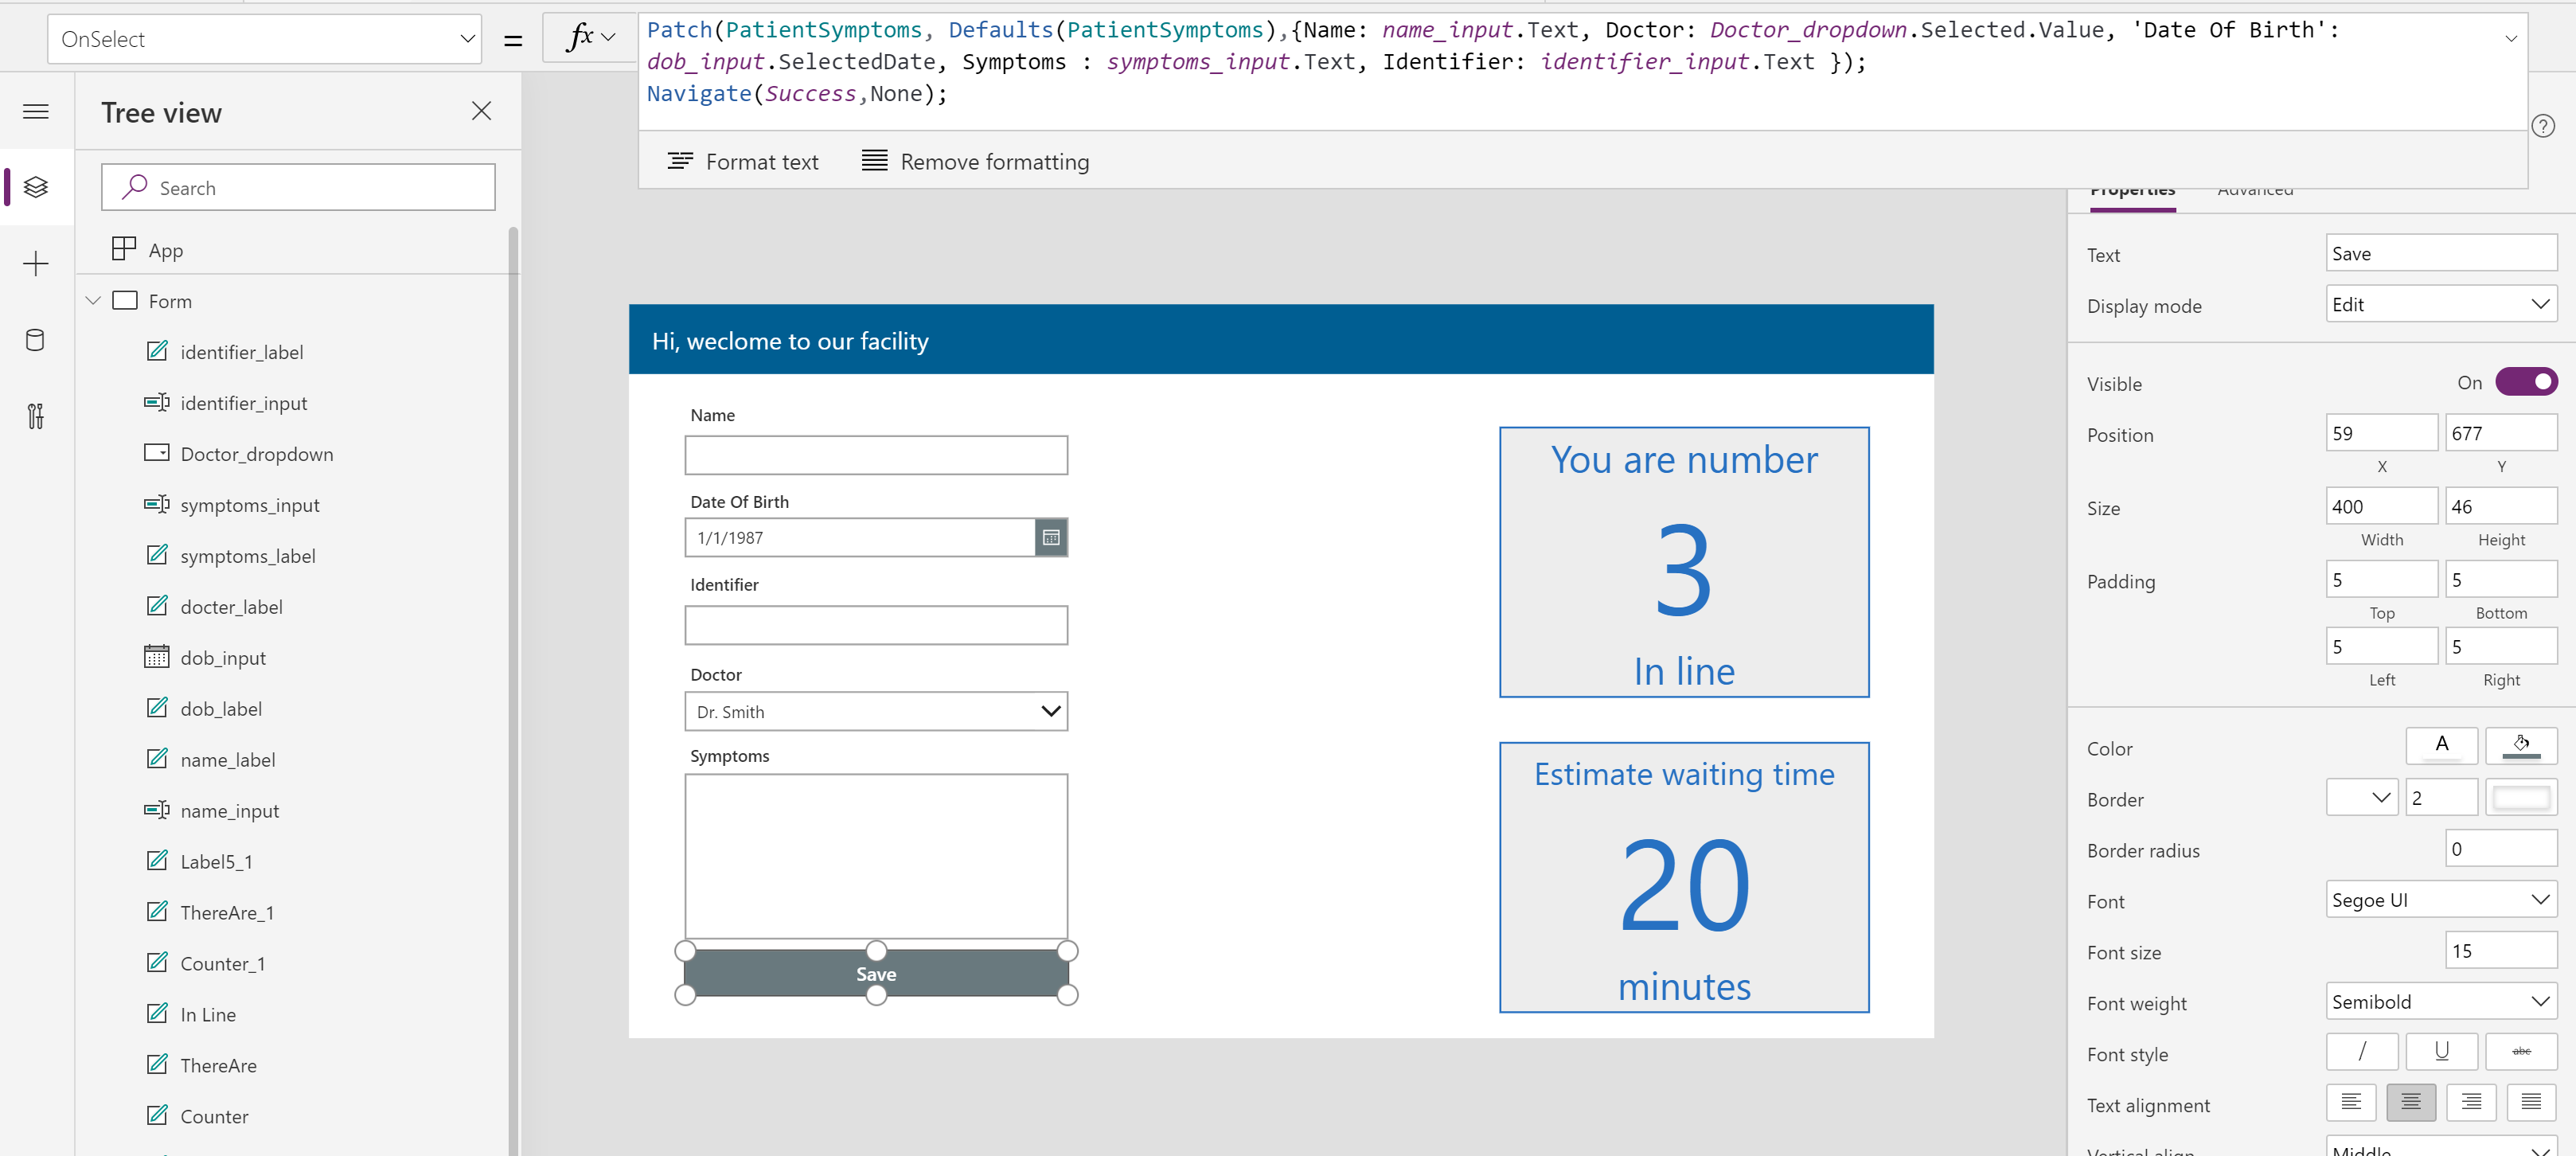
Now we need to use the Patch function. This allows us to create a new element in the Common Data Service.
You can start by copying and pasting following code:
Patch(PatientSymptoms, Defaults(PatientSymptoms),{Name: name_input.Text, Doctor: Doctor_dropdown.Selected.Value, 'Date Of Birth': dob_input.SelectedDate, Symptoms : symptoms_input.Text, Identifier: identifier_input.Text });
You need to rename the name of the elements, to the one that you created.
If the red cross disappears in the button, you know the formula is correct.

Almost there!
We now created a new PowerApp, added our entity and saved the data into our new PatientSymptom entity.
The last step is starting a flow, based on the newly created record in our Common Data System.
To execute flows, we are going to use Power Automate.
To start working with Power Automate, you can navigate to https://make.powerapps.com/ and click on Flows (AKA Power Automate), click on New, in the left upper corner and select Instant – From Blank.
Give the flow a relevant name, such as StartCDSFlow, and click on Skip.
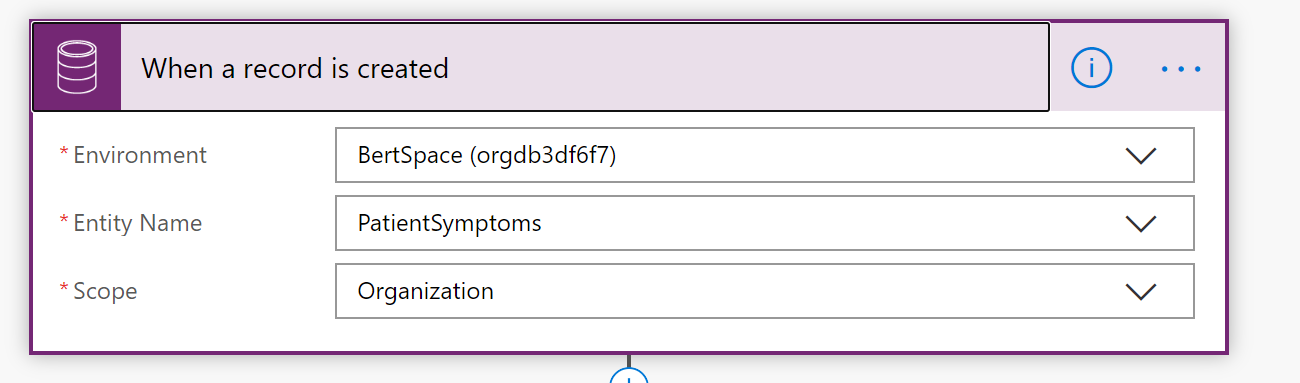
Now Search on the Common Data Service in the search bar, select the icon and chose when a record is created
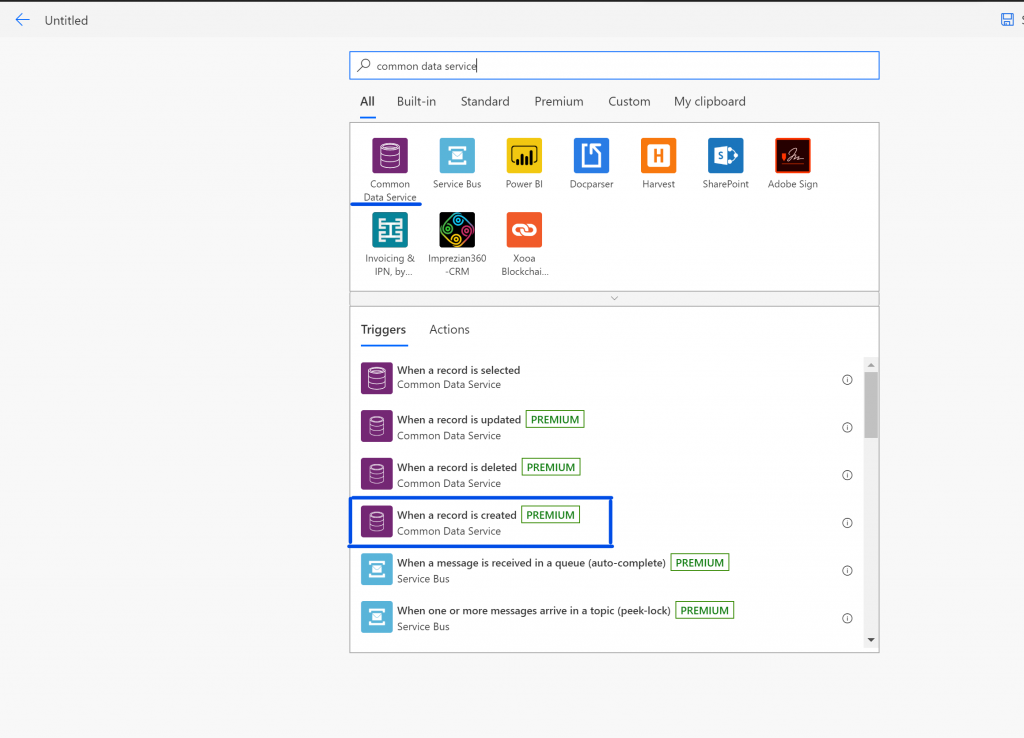
When you selected When a record is created, you then need to select your Environment, Entity Name and Scope.
The next steps of this flow is getting the data and sending it to an external service to start processing the data.
If you want to see the complete flow, you can scroll to the bottom of this post and navigate to the Github page, there you will find the whole solution.

In the next post I will dive deeper on the Bot, how it handles the received data from the Flow, send this to Teams, and from Teams to our Azure FHIR API. Stay tuned!
The full solution can be found here: https://github.com/iBoonz/PatientSymptoms