
Following up on the Patient Symptoms series, I want to dive deeper on the what Bot solution(s) I used, how this is integrated into Microsoft Teams and briefly touch upon the FHIR server integration.

This post is a follow-up on: how to capture Patient Symptom Information and Patient Symptoms – Powered on
In the previous post, I finished with sending the patient symptom information to a bot via Microsoft Power Automate (AKA. Microsoft Flow). That information needs to be handled and send in an proactive way to Microsoft Teams.
I am going to show you how you can do this with the Bot Framework V4 and how easy you can do this with the Microsoft Health Bot.
All the code is available via the link on the bottom of this post.
Bot Framework V4
I was curious to see how I could use the Bot Framework V4 to proactively send messages to Microsoft Teams. To be completely honest, it took me more time than I initially thought. Here is how I did it.
Create Solution
As with many Microsoft projects, there is almost always example content available. The Microsoft Docs has such a page. Keep in mind that this one is not integrated with Microsoft Teams, so we are not there yet :).
I went through the steps in the docs, cloned the GitHub repository and had the the base for this project.
Teams SDK
When I initially cloned the solution (November 2019), the Bot Framework SDK had no support for Microsoft Teams. And for that reason I needed to copy the files from the Botbuilder – Microsoft Teams Github page, and added the needed projects to my existing bot solution
Luckily, with the 4.6 release of the Bot Framework SDK, this is now included. So make sure you have the latest Bot Framework SDK referenced.
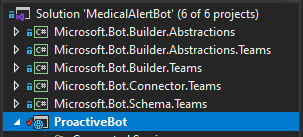
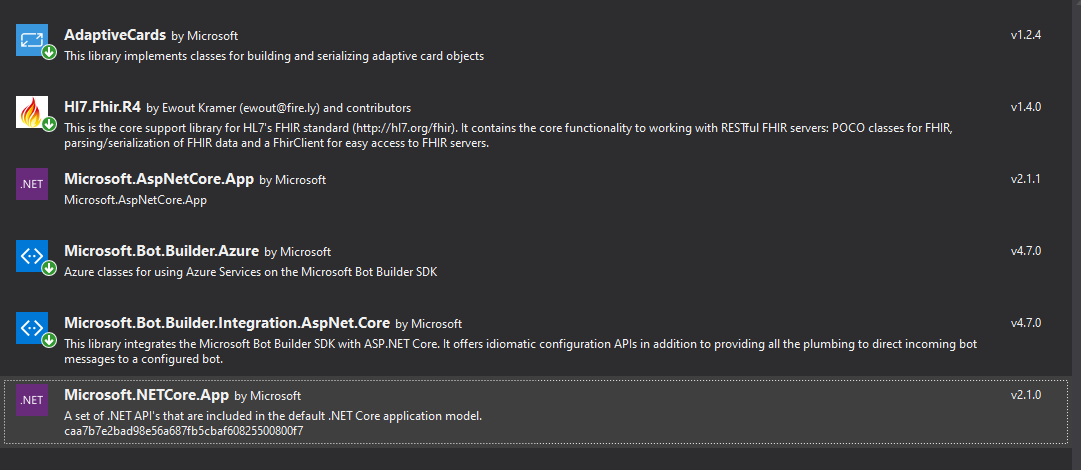
These are the NuGet packages that I added to my project
API Controller
In the last post we finished with sending data via Microsoft Power Automate to the bot endpoint.
The Bot project has a separate API endpoint that can receive messages which trigger proactive messages. The logic of this particular endpoint can be found below
[HttpPost]
public async Task<IActionResult> Post([FromBody]PatientSymptomInfoDto patientSymptomInfo)
{
if(string.IsNullOrWhiteSpace(patientSymptomInfo.Key) || patientSymptomInfo.Key != "s2Rw0......")
{
return new ContentResult()
{
Content = "<html><body><h1>Not all required fields are provided.</h1></body></html>",
ContentType = "text/html",
StatusCode = (int)HttpStatusCode.Unauthorized,
};
}
var container = GetCloudBlobContainer("bot-metadata");
BlobContinuationToken continuationToken = null;
int? maxResultsPerQuery = null;
var response = await container.ListBlobsSegmentedAsync(string.Empty, true, BlobListingDetails.Metadata, maxResultsPerQuery, continuationToken, null, null);
continuationToken = response.ContinuationToken;
foreach (var item in response.Results.OfType<CloudBlockBlob>())
{
using (MemoryStream mem = new MemoryStream())
{
await item.DownloadToStreamAsync(mem);
mem.Position = 0;
StreamReader reader = new StreamReader(mem);
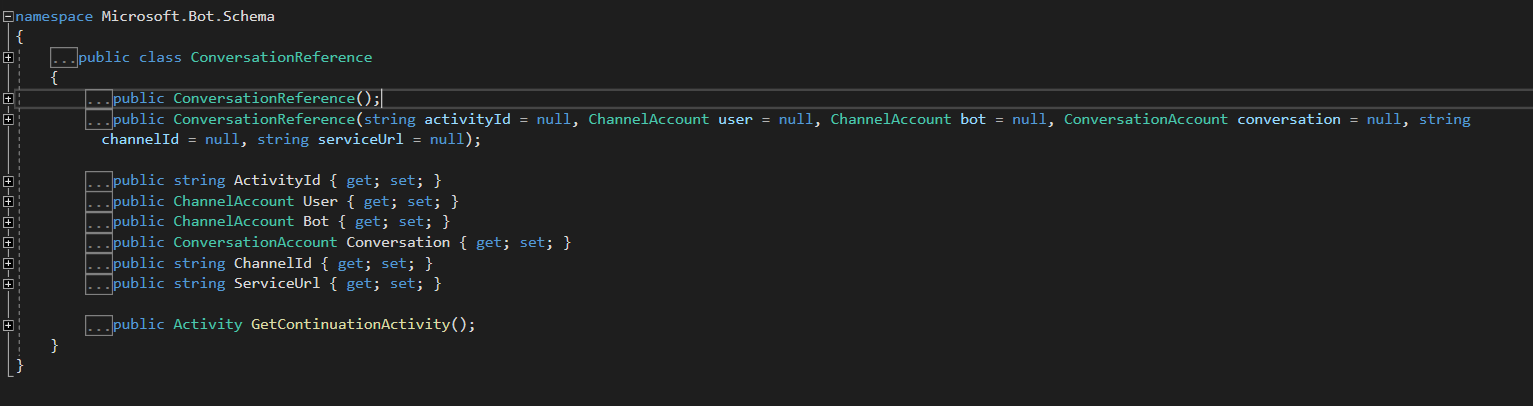
var conversationReference = JsonConvert.DeserializeObject<ConversationReference>(reader.ReadToEnd());
await ((BotAdapter)_adapter).ContinueConversationAsync(_appId, conversationReference, async (turnContext, token) => {
MicrosoftAppCredentials.TrustServiceUrl(turnContext.Activity.ServiceUrl);
var connectorClient = new ConnectorClient(new Uri(turnContext.Activity.ServiceUrl), _credentialProvider.AppId, _credentialProvider.Password);
var parameters = new ConversationParameters
{
Bot = turnContext.Activity.Recipient,
Members = new List<ChannelAccount> { turnContext.Activity.From },
ChannelData = JObject.FromObject(
new TeamsChannelData
{
Tenant = new TenantInfo
{
Id = "YOUR TENANT ID",
},
Channel = new ChannelInfo
{
Id = "YOUR CHANNEL ID@thread.skype"
}
},
JsonSerializer.Create(new JsonSerializerSettings()
{
NullValueHandling = NullValueHandling.Ignore,
})),
};
var conversationResource = await connectorClient.Conversations.CreateConversationAsync(parameters);
var message = Activity.CreateMessageActivity();
var adaptiveCard = new AdaptiveCard(new AdaptiveSchemaVersion(1, 0))
{
Body = new List<AdaptiveElement>()
{
new AdaptiveTextBlock($"Notification for {patientSymptomInfo.Doctor}")
{
Weight = AdaptiveTextWeight.Bolder,
Size = AdaptiveTextSize.Medium
},
new AdaptiveColumnSet()
{
Columns = new List<AdaptiveColumn>
{
new AdaptiveColumn()
{
Width = "auto",
Items = new List<AdaptiveElement>()
{
new AdaptiveImage("https://cdn1.iconfinder.com/data/icons/medical-health-care-thick-colored-version/33/male_patient-512.png")
{
Size = AdaptiveImageSize.Small,
Style = AdaptiveImageStyle.Person
}
}
},
new AdaptiveColumn()
{
Width = "stretch",
Items = new List<AdaptiveElement>()
{
new AdaptiveTextBlock(patientSymptomInfo.PatientName)
{
Weight = AdaptiveTextWeight.Bolder,
Wrap = true
},
new AdaptiveTextBlock(patientSymptomInfo.PatientDob)
{
Wrap = true,
IsSubtle = true,
Spacing = AdaptiveSpacing.None
}
}
}
},
},
new AdaptiveTextBlock(patientSymptomInfo.Symptoms)
{
Wrap = true,
IsSubtle = true
},
new AdaptiveFactSet()
{
Facts = new List<AdaptiveFact>()
{
new AdaptiveFact("Symptom", patientSymptomInfo.SignSymptomMention),
new AdaptiveFact("Medication", patientSymptomInfo.MedicationMention),
new AdaptiveFact("Disease", patientSymptomInfo.DiseaseDisorderMention),
new AdaptiveFact("Anatomical", patientSymptomInfo.AnatomicalSiteMention),
}
}
},
Actions = new List<AdaptiveAction>()
{
new AdaptiveSubmitAction()
{
Title = "Send to EMR",
Id = "sendToEmr",
DataJson = JsonConvert.SerializeObject(patientSymptomInfo)
}
}
};
await connectorClient.Conversations.SendToConversationAsync(conversationResource.Id,
(Activity)MessageFactory.Attachment(new Attachment
{
ContentType = AdaptiveCard.ContentType,
Content = JObject.FromObject(adaptiveCard),
}));
}, default(CancellationToken));
}
}
Normally you would put this logic neatly in some service class, enable a more secure authentication flow between the Power Automate and the Api endpoint, such as oAuth client credentials. But this is not the focus of this demo ;).
The Post method starts by querying an Azure Blob container that contains metadata. These items are a list of user metdata that subscribed to notifications. To get proactive notifications in Microsoft Teams, the bot needs to have some information and this is captured when the user subscribes to the bot via Teams.
With the ConversationReference object we can create a new connectorClient and implement the ConversationParameter to create a Conversation for every subscribed user. Good to know is that the users first need to subscribe to the proactive messages, so the bot later knows who to ping.
await item.DownloadToStreamAsync(mem);
                    mem.Position = 0;
                    StreamReader reader = new StreamReader(mem);
                    var conversationReference = JsonConvert.DeserializeObject<ConversationReference>(reader.ReadToEnd());
                    await ((BotAdapter)_adapter).ContinueConversationAsync(_appId, conversationReference, async (turnContext, token) => {
                        MicrosoftAppCredentials.TrustServiceUrl(turnContext.Activity.ServiceUrl);
                        var connectorClient = new ConnectorClient(new Uri(turnContext.Activity.ServiceUrl), _credentialProvider.AppId, _credentialProvider.Password);

                        var parameters = new ConversationParameters
                        {
                            Bot = turnContext.Activity.Recipient,
                            Members = new List<ChannelAccount> { turnContext.Activity.From },
                            ChannelData = JObject.FromObject(
                                new TeamsChannelData
                                {

                                    Tenant = new TenantInfo
                                    {
                                        Id = "YOUR TENANT ID",
                                    },
                                    Channel = new ChannelInfo
                                    {
                                        Id = "YOUR CHANNEL ID@thread.skype"
                                    }
                                },
                                JsonSerializer.Create(new JsonSerializerSettings()
                                {
                                    NullValueHandling = NullValueHandling.Ignore,
                                })),
                        };

  var conversationResource = await connectorClient.Conversations.CreateConversationAsync(parameters);
                        var message = Activity.CreateMessageActivity();
The content of the conversation will put in an Adaptive Card. Adapative cards are platform-agnostic snippets of UI, authored in JSON, that apps, such as Microsoft Teams, Outlook, Bot Framework Web chat, … and services can openly exchange.
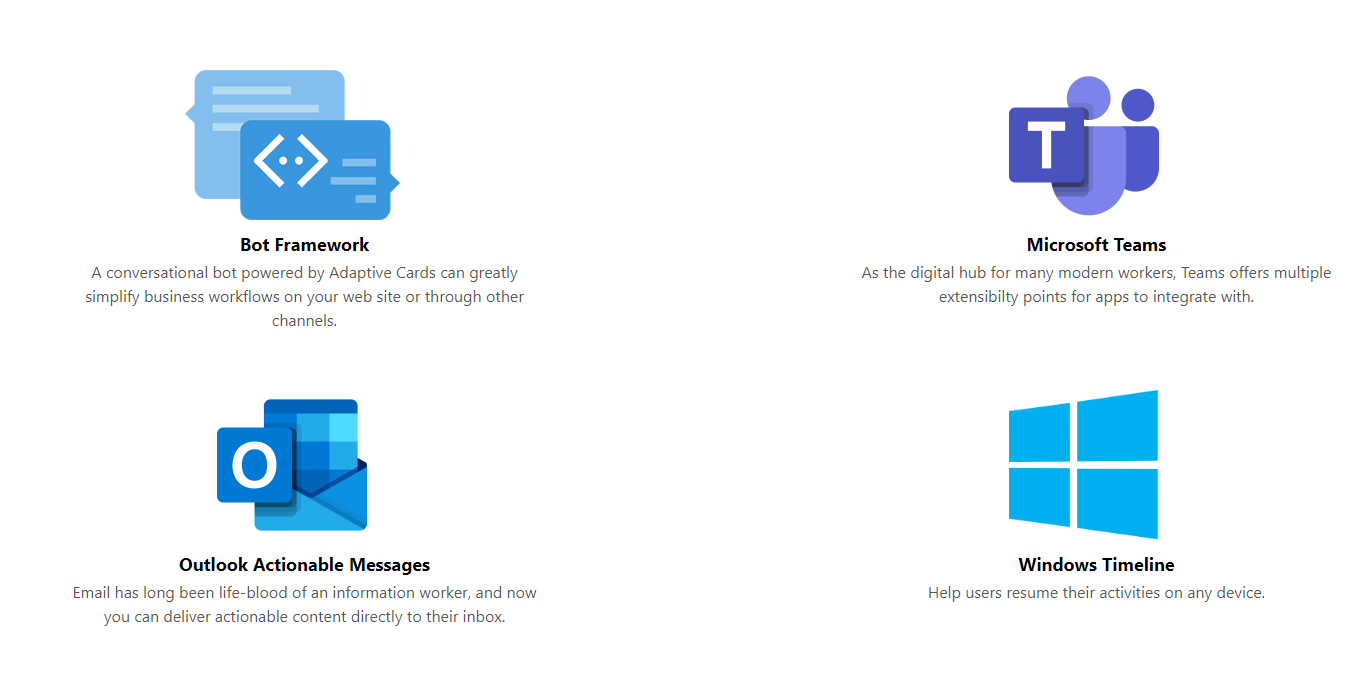
You can easily design an adaptive card via the online designer. You can load this via JSON or create it via the Adaptive card SDK.
var adaptiveCard = new AdaptiveCard(new AdaptiveSchemaVersion(1, 0))
                        {
                            Body = new List<AdaptiveElement>()
                            {
                                new AdaptiveTextBlock($"Notification for {patientSymptomInfo.Doctor}")
                                {
                                    Weight = AdaptiveTextWeight.Bolder,
                                    Size = AdaptiveTextSize.Medium
                                },
                                new AdaptiveColumnSet()
                                {
                                    Columns = new List<AdaptiveColumn>
                                    {
                                        new AdaptiveColumn()
                                        {
                                            Width = "auto",
                                            Items = new List<AdaptiveElement>()
                                            {
                                                new AdaptiveImage("https://cdn1.iconfinder.com/data/icons/medical-health-care-thick-colored-version/33/male_patient-512.png")
                                                {
                                                    Size = AdaptiveImageSize.Small,
                                                    Style = AdaptiveImageStyle.Person
                                                }
                                            }
                                        },
                                        new AdaptiveColumn()
                                        {
                                            Width = "stretch",
                                            Items = new List<AdaptiveElement>()
                                            {
                                                new AdaptiveTextBlock(patientSymptomInfo.PatientName)
                                                {
                                                    Weight = AdaptiveTextWeight.Bolder,
                                                    Wrap = true
                                                },
                                                new AdaptiveTextBlock(patientSymptomInfo.PatientDob)
                                                {
                                                    Wrap = true,
                                                    IsSubtle = true,
                                                    Spacing = AdaptiveSpacing.None
                                                }
                                            }
                                        }
                                    },

                                },
                                new AdaptiveTextBlock(patientSymptomInfo.Symptoms)
                                {
                                    Wrap = true,
                                    IsSubtle = true
                                },
                                new AdaptiveFactSet()
                                {
                                    Facts = new List<AdaptiveFact>()
                                    {
                                        new AdaptiveFact("Symptom", patientSymptomInfo.SignSymptomMention),
                                        new AdaptiveFact("Medication", patientSymptomInfo.MedicationMention),
                                        new AdaptiveFact("Disease", patientSymptomInfo.DiseaseDisorderMention),
                                        new AdaptiveFact("Anatomical", patientSymptomInfo.AnatomicalSiteMention),
                                    }
                                }
                            },
                            Actions = new List<AdaptiveAction>()
                            {
                                new AdaptiveSubmitAction()
                                {
                                     Title = "Send to EMR",
                                     Id = "sendToEmr",
                                     DataJson = JsonConvert.SerializeObject(patientSymptomInfo)
                                }
                            }
                        };
The snippet above, generates the adaptive card that is shown below.

Subscribe and Unsubscribe Users via the Bot
As mentioned before, the bot needs to have metadata information, to know the user, the channel, the internal id, ..
All this metadata is stored in the ConversationReference object, and persisted in Azure Blob Storage.
When you add the bot to your channel in Teams, the user can Subscribe or Unsubscribe to proactive messages. With the Subscribe method, the bot saves the conversation reference of the user, and thus knows where to send the messages to. With Unsubscribe the bot removes the conversation reference from the storage account. This is all done in the OnMessageActivityAsync method.
        protected override async Task OnMessageActivityAsync(ITurnContext<IMessageActivity> turnContext, CancellationToken cancellationToken)
        {
            if (turnContext.Activity.Type == ActivityTypes.Message)
            {
                if(turnContext.Activity.Value != null)
                {
                    var activityValueString = turnContext.Activity.Value.ToString();
                    if (activityValueString.Contains("AnatomicalSiteMention"))
                    {
                        var patientSymptomInfo = JsonConvert.DeserializeObject<PatientSymptomInfoDto>(activityValueString);
                        await _fhirService.SendDataToFHIRServer(patientSymptomInfo);
                    }

                    await turnContext.SendActivityAsync(MessageFactory.Text($"The data has been succesfully send to the EMR"), cancellationToken);
                }
                else if (!string.IsNullOrWhiteSpace(turnContext.Activity.Text))
                {
                    if (turnContext.Activity.Text.Contains("Unsubscribe"))
                    {
                        RemoveConversationReference(turnContext.Activity as Activity);
                        await turnContext.SendActivityAsync(MessageFactory.Text($"You have been successfully unsubscribed from the patient symptoms"), cancellationToken);
                    }
                    else if (turnContext.Activity.Text.Contains("Subscribe"))
                    {
                        await AddConversationReference(turnContext.Activity as Activity);
                        await turnContext.SendActivityAsync(MessageFactory.Text($"You have been successfully subscribed to the patient symptoms"), cancellationToken);
                    }
                    else
                    {
                        await turnContext.SendActivityAsync(MessageFactory.Text($"Currently I can only let you subscribe or unsubscribe on patient Symptoms"), cancellationToken);
                    }
                }
            }
        }
Adding the bot to Teams
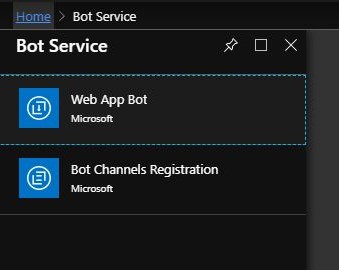
We now need to push our code to the Azure Bot Service. Navigate to https://portal.azure.com and create a new Web App Bot Service.
Fill in the required fields, and in this case we are choosing for the Echo Bot. Just take the simplest template available, as we will overwrite it with our code.
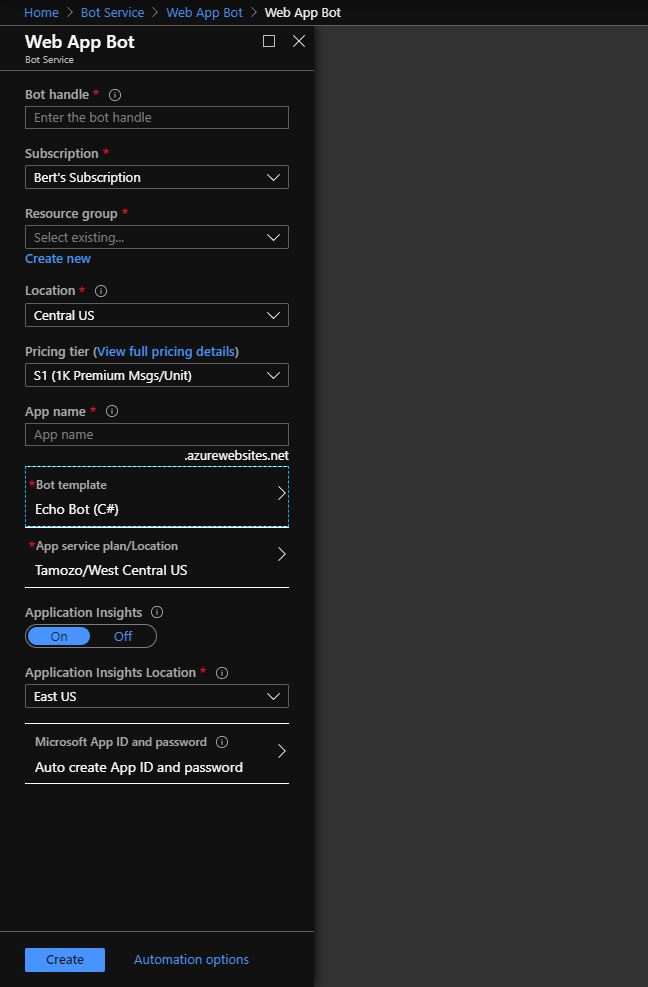
When your bot service has been provisioned, download the publish profile, push the code to the Bot Service and enable the Teams channel in the Web App Bot. Later we will add see how to add this in teams.
Let’s try the same with the Microsoft Health Bot Service
We now have seen, what is needed to create a proactive bot in Microsoft Teams. But keep in mind, real life enterprise use cases require much more functionality from a bot, such as NLP, translations, compliance and security functionality, multiple scenarios, extendable, being able to integrate with your back end, authentication, audit trails …
When creating your bot solutions, you really need to take this into account, it will take you or your organization the needed effort and time to have this in place. That’s why I wanted to show how easy and fast you can do this with the Microsoft Health Bot Service, whilst having all the other features out of the box available.
First you need to create a new (free) Health Bot Service via Azure. This link explains how to do it. When you have created your Healthbot instance, navigate to the Healthbot portal.
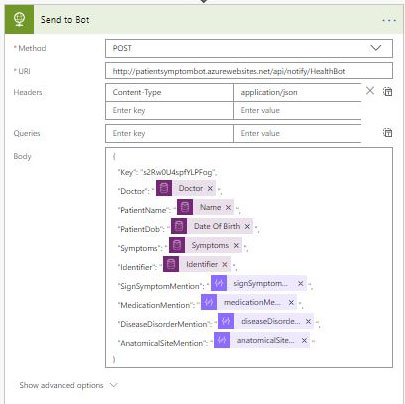
To trigger the Healthbot, we need to modify our Power Automate step and send the payload to another API method that will trigger our Healthbot instance.
[HttpPost("HealthBot")]
        public async Task<IActionResult> PostToHealthBot([FromBody]PatientSymptomInfoDto patientSymptomInfo)
        {
            if (string.IsNullOrWhiteSpace(patientSymptomInfo.Key) || patientSymptomInfo.Key != "tRwMs2Rw0U4si5fNZva1GZU6vskxCpfYLPFog")
            {
                return BadRequest();
            }

            var message = System.IO.File.ReadAllText(Path.Combine(AppDomain.CurrentDomain.BaseDirectory, "DeploymentTemplates/healthbot-proactive-message.json"));
            var healthBotProactiveMessage = JsonConvert.DeserializeObject<HealthBotProActiveMessage>(message);
            healthBotProactiveMessage.args = new Args
            {
                Doctor = patientSymptomInfo.Doctor,
                AnatomicalSiteMention = patientSymptomInfo.AnatomicalSiteMention,
                DiseaseDisorderMention = patientSymptomInfo.DiseaseDisorderMention,
                Identifier = patientSymptomInfo.Identifier,
                MedicationMention = patientSymptomInfo.MedicationMention,
                PatientDob = patientSymptomInfo.PatientDob,
                PatientName = patientSymptomInfo.PatientName,
                SignSymptomMention = patientSymptomInfo.SignSymptomMention,
                Symptoms = patientSymptomInfo.Symptoms
            };

            using (HttpClient client = new HttpClient())
            {
                client.DefaultRequestHeaders.Authorization = new AuthenticationHeaderValue("Bearer", GenerateToken());
                client.DefaultRequestHeaders.Accept.Add(new MediaTypeWithQualityHeaderValue("application/json"));
                var httpContent = new StringContent(JsonConvert.SerializeObject(healthBotProactiveMessage), Encoding.UTF8, "application/json");
                HttpResponseMessage response = await client.PostAsync("https://bot-eu.healthbot.microsoft.com/api/tenants/beloning-9my8uj9/beginScenario", httpContent);
            }

            return Ok();
        }
The code snippet above also creates a metadata object, it contains similar information that we needed before for the Bot Framework SDK. More information about the metadata can be found here.
One of these parameters in the Metadata file is the Scenario property, this contains the scenario we are going to trigger in the Healthbot.
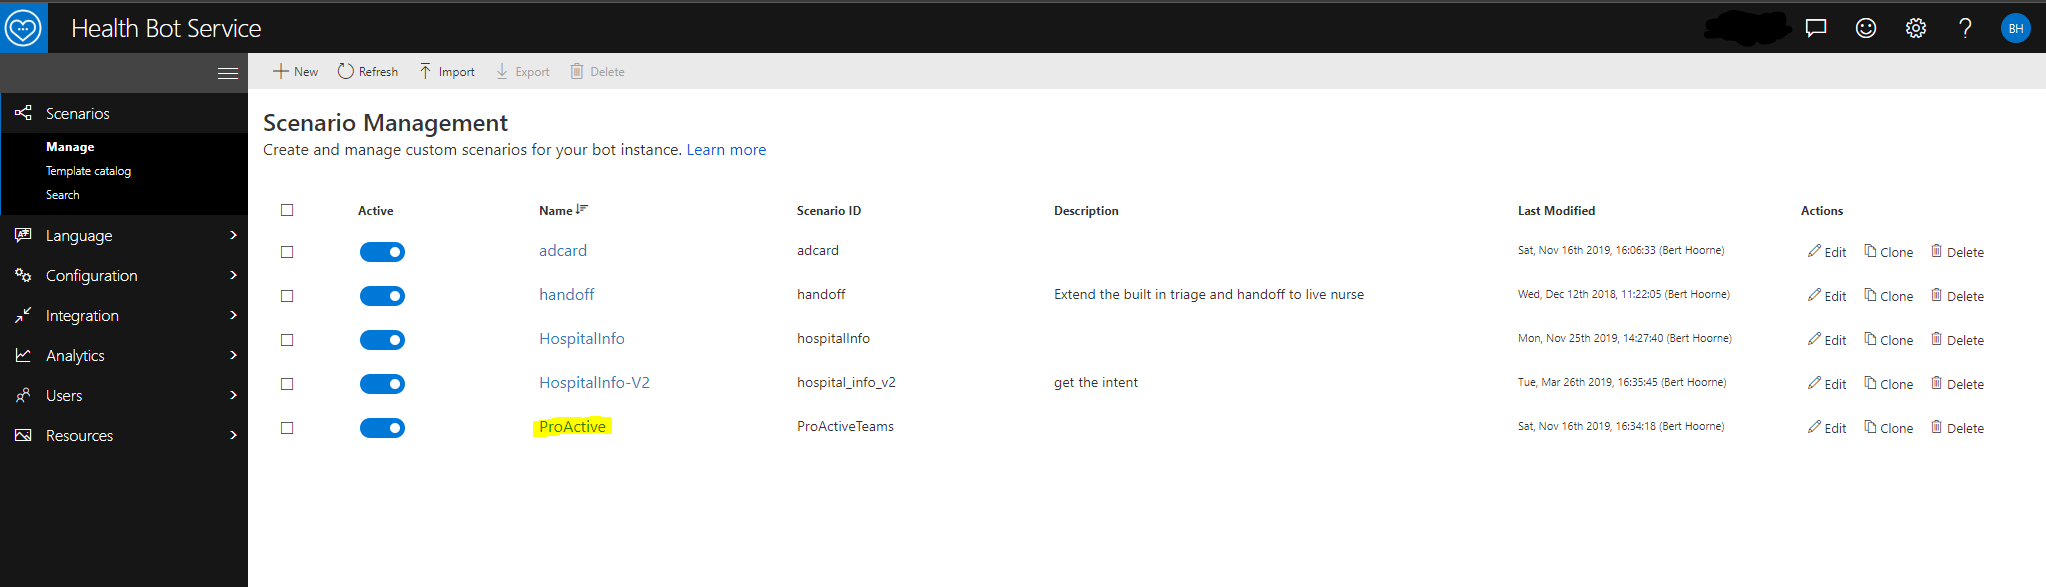
When navigating back to the Healthbot Service portal, you can create or edit scenarios via the browser. For this use case, we only need a prompt.
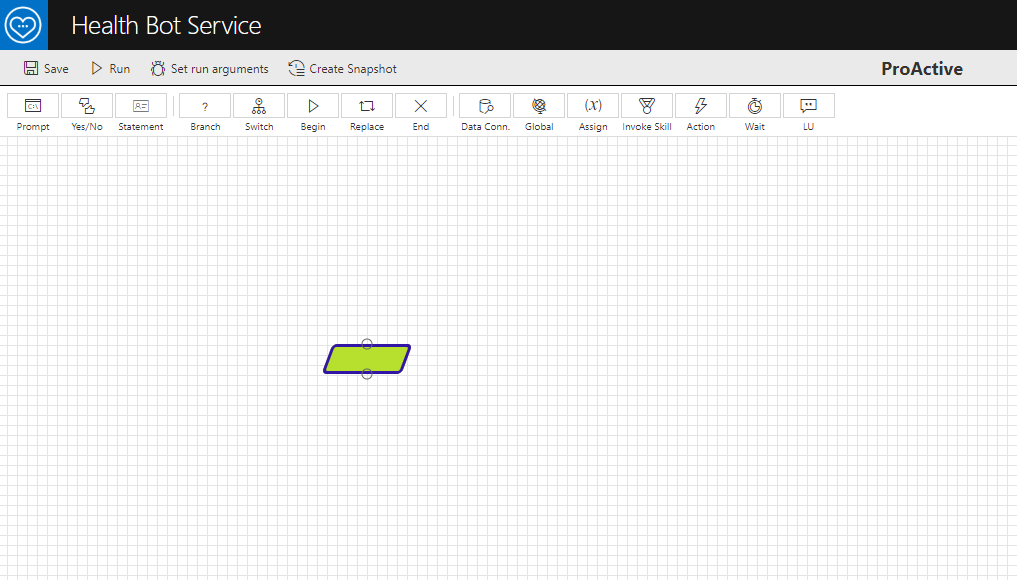
Remember the Adaptive Cards from before? The Healthbot Service also supports this format , and you can access the data that has been send by the API controller via the scenario Author. The full scenario is available in the link below. You can easily import this in your Healthbot Instance.

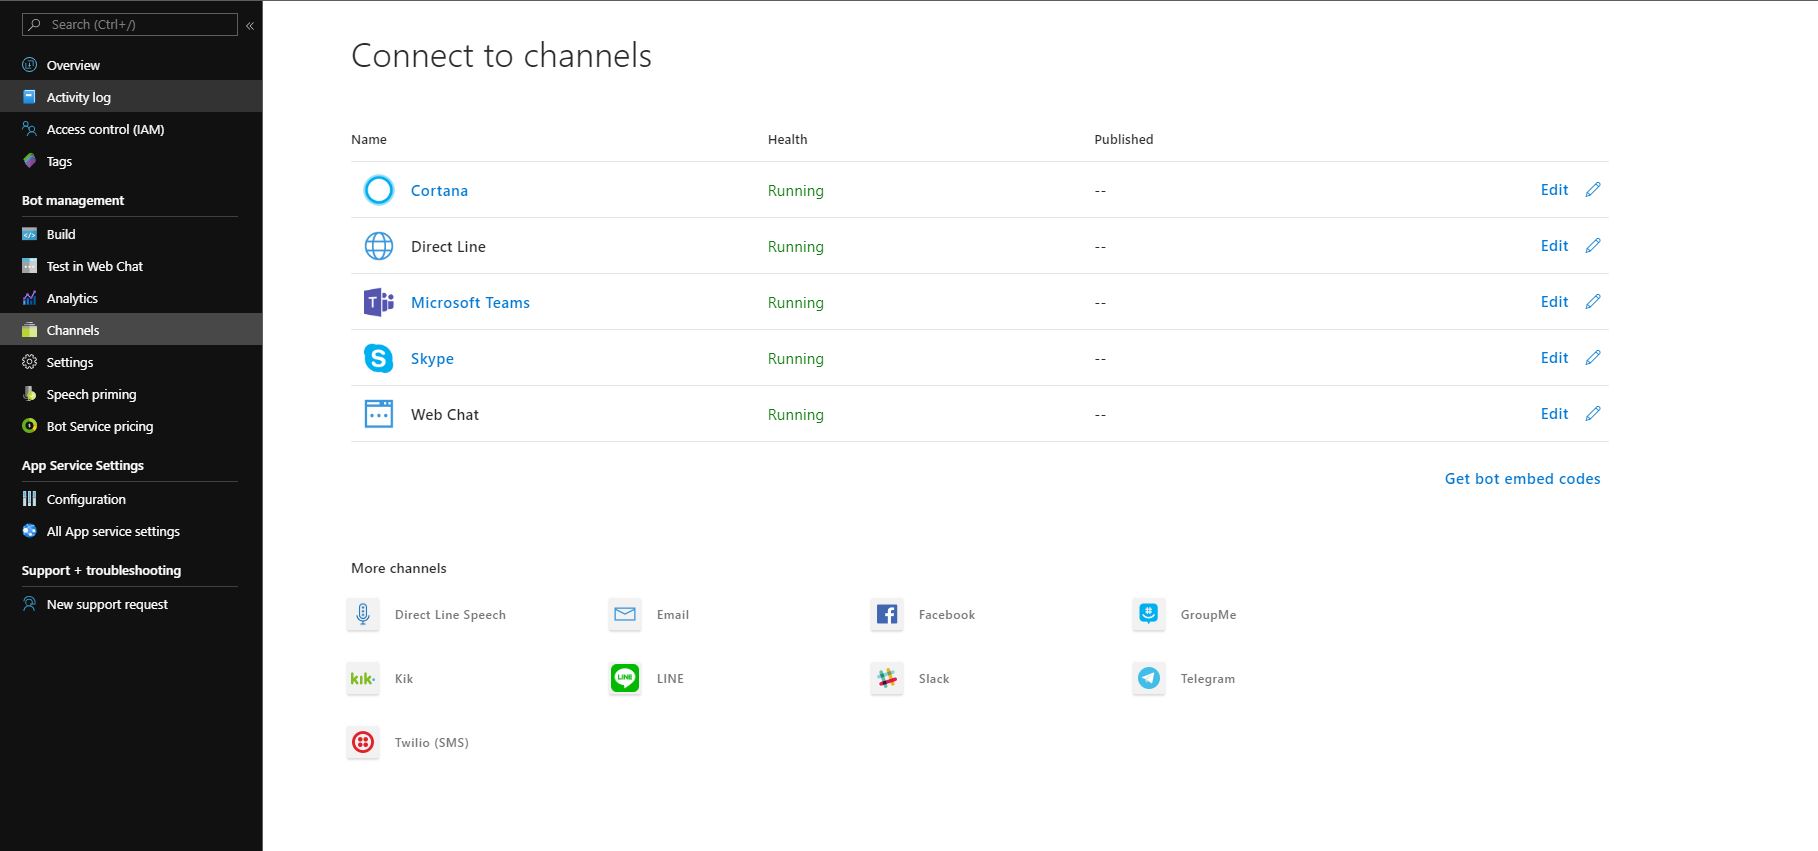
The last thing to do, is to enable Teams for your Healthbot Service, again, this can be easily done, by navigating to the channels and enable Microsoft Teams.
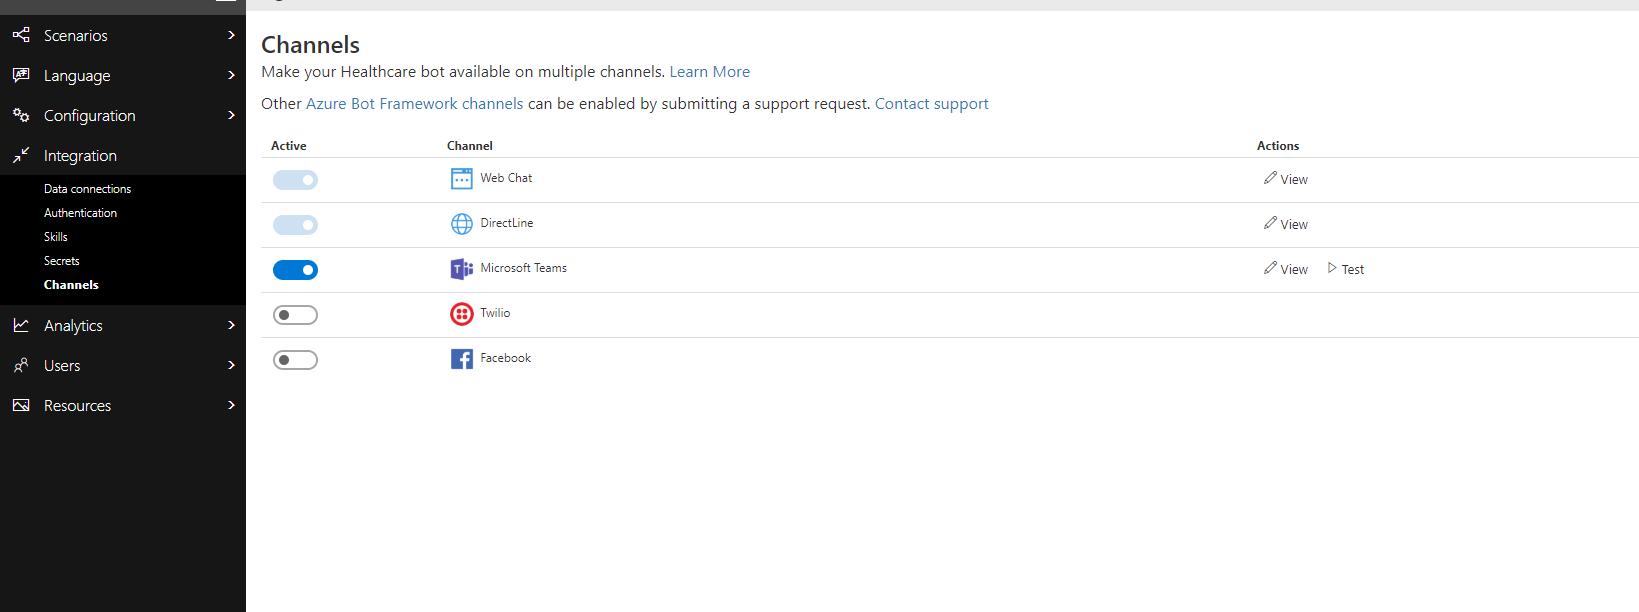
And that’s it, The API sends the message to the Healthbot Service, where we implemented the Adaptive Card and added the information from the API to the Card which is now ready to be consumed by Microsoft Teams
Install our bot(s) in Teams
We created a proactive bot via the Bot Framework and via the Microsoft Health Bot Service. Because both are build upon the Microsoft Bot Connector, we can install them both in the same way on Teams.
You could directly write a JSON manifest, but I recommend using App Studio, you can install App Studio from the Teams store. This allows you to add new applications in a visual guided way.
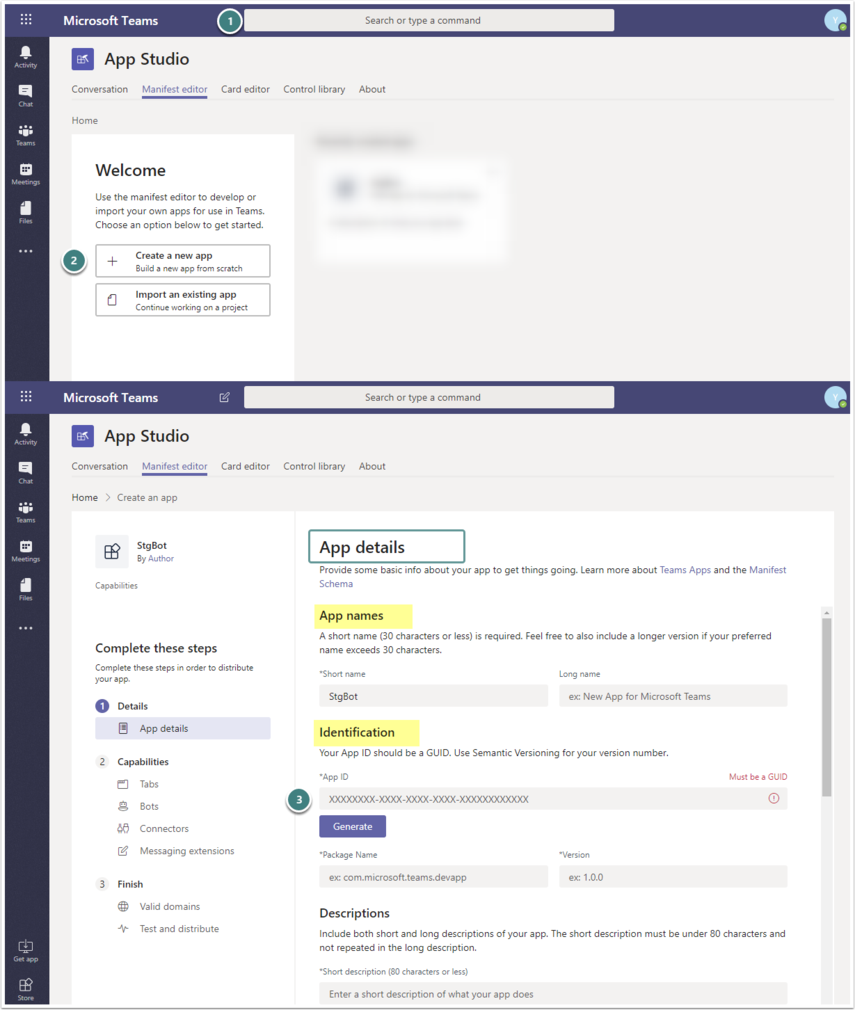
- Find the installed App Studio via User Search Field at the top of the chat
- App Studio > Manifest editor tab > Create a new app
- App Details > Complete all the required fields
- Microsoft Bot Framework SDK App ID can be found in the settings pane of Azure
- Healthbot App ID can be found on the channels page in the Healthbot
Configure the capabilities
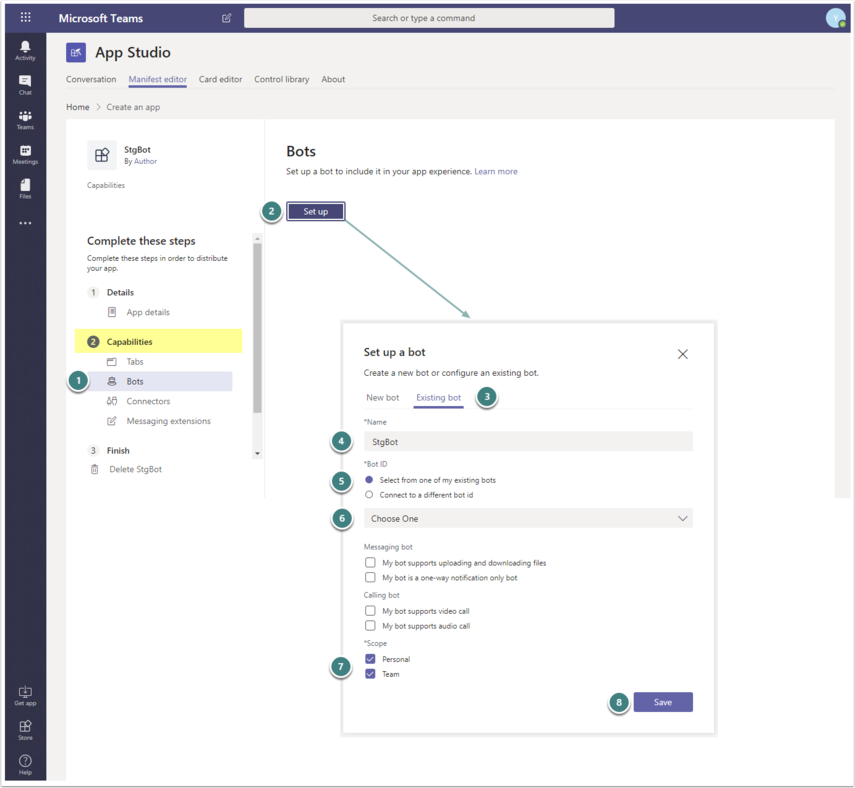
- Go to Capabilities > Bots
- Click [Set up] to proceed
- Switch to the Existing bot tab
- Specify the Bot’s Name
- Bot ID: choose the option “select from existing bots”
- In the drop-down Suggest List, find your Bot
- Scopes determine which type of conversations the Bot will support
- Add both Personal (to support conversations between a bot and a single user) and Team Scope (to allow channel conversations)
- Save your inputs
Test And Distribute
To test and distribute your bot, you can easily install this via App Studio.
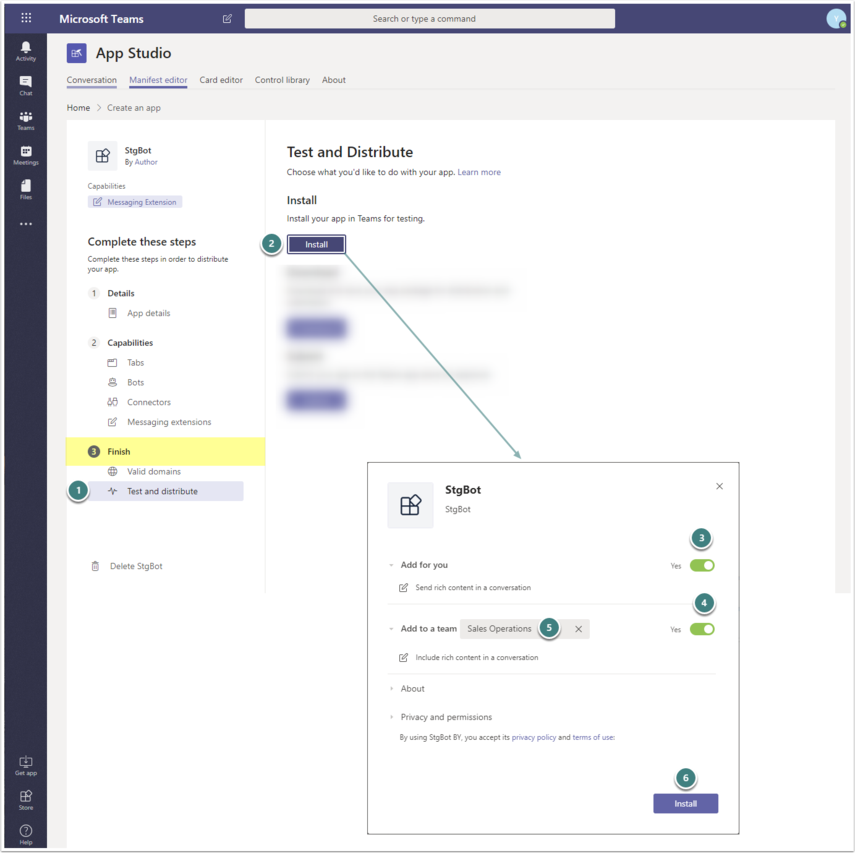
- Go to Finish > Test and distribute
- Clicking [Install] opens the configuration pop-up
- Add for you: switch the toggle to “yes”
- Add to a team: switch the toggle to “yes”
- In the dropdown list, select the Team
- Click [Install] to initiate the installation process
Send the data to the FHIR server
The data can now be send to FHIR via both our solutions. I will not cover the FHIR part in this post, as it is already quite packed. The source code for the Bot Framework V4 can be found in the link below, it contains a FHIR service that creates a FHIR appointment resource and send that information to the Microsoft Azure API for FHIR. this is very similar for the Healthbot and can be done in the Scenario Author, as this can be easily linked to any API in a secure way
Source Code
All the relevant code and files can be found on Github via following link